Close Menu
Homemade Skincare Recipes and Beauty Tips
    Pinterest
    Trending
    • DIY Rosemary Water Hair Rinse
    • Brown Sugar & Coconut Oil Scrub
    • Oatmeal & Yogurt Soothing Scrub
    • Turmeric & Rice Flour Scrub for Dark Spots
    • Coffee & Sugar Scrub Recipe at Home
    • DIY Lemon & Honey Body Scrub for Bright Skin
    • How to Do a Skincare Patch Test
    • How to Make Rice Water Rinse for Hair Growth
    • About Us
    • Contact Us
    • Disclaimer
    • Privacy Policy
    • Terms
    Homemade Skincare Recipes and Beauty Tips
    • Home
    • DIY Body Scrub Recipes
    • DIY Face Mask Recipes
    • DIY Body Butter Recipes
    • DIY Hair Growth Recipes
    • DIY Lip Balm Recipes
    Homemade Skincare Recipes and Beauty Tips
    Home»DIY Homemade Face Mask Recipes»How to Make an Easy Chamomile and Avocado Face Mask at Home for Glowing Skin
    DIY Homemade Face Mask Recipes

    How to Make an Easy Chamomile and Avocado Face Mask at Home for Glowing Skin

    HersheyBy HersheyDecember 22, 2022No Comments5 Mins Read
    Facebook Twitter Pinterest LinkedIn Tumblr Email
    Share
    Facebook Twitter LinkedIn Pinterest Email
    How to Make an Easy Chamomile and Avocado Face Mask at Home for Glowing Skin

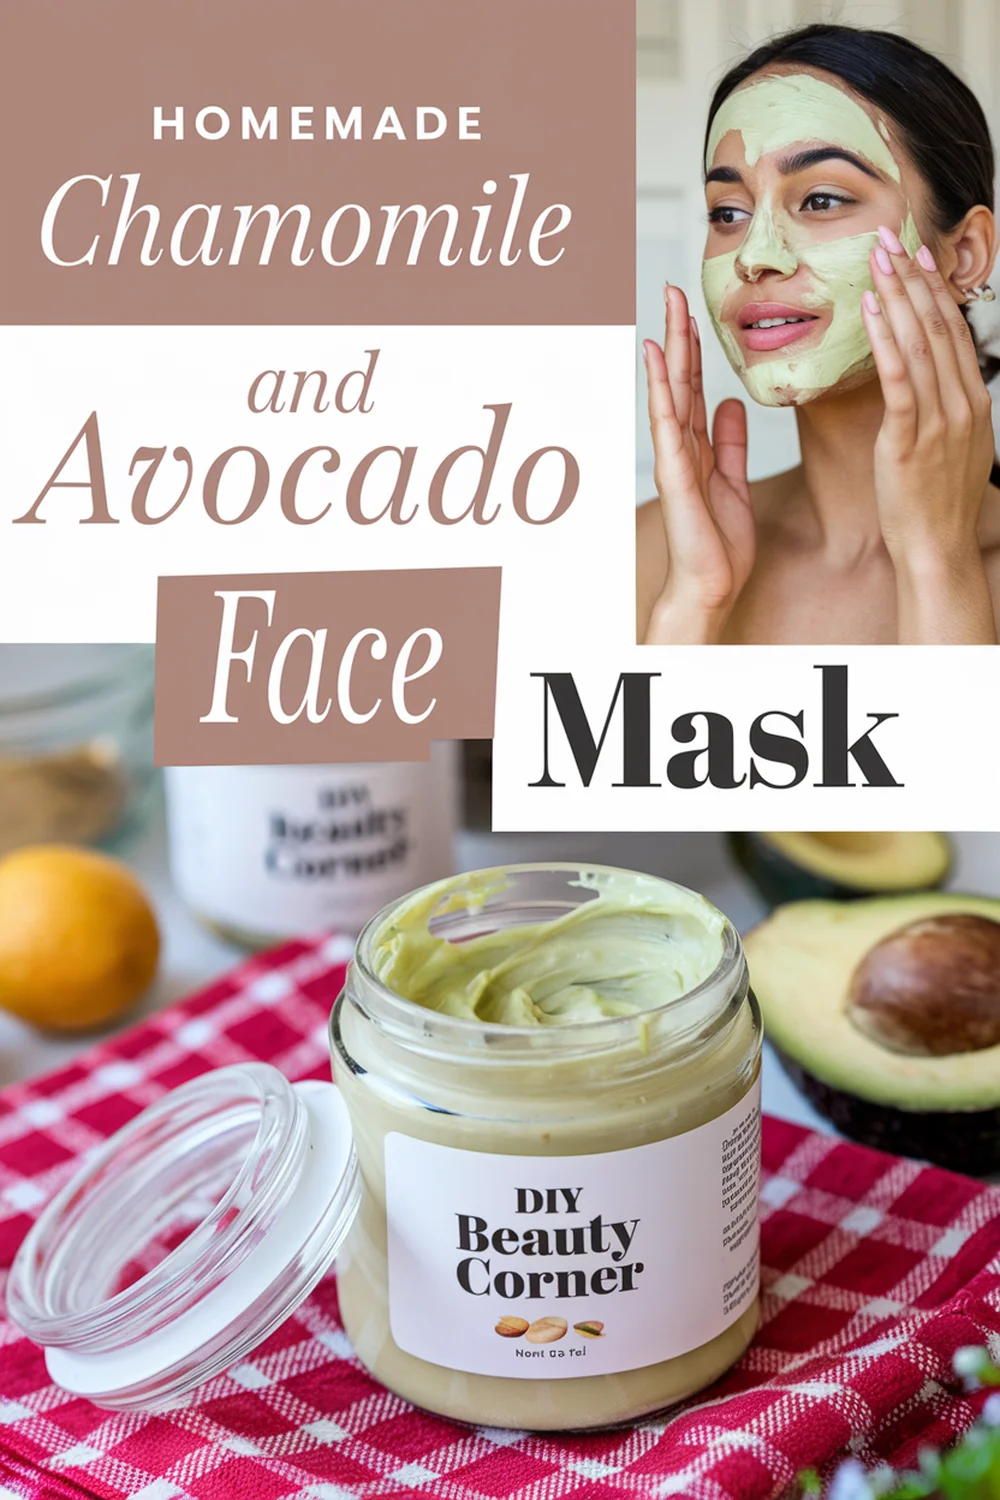
    If you’re seeking a simple yet effective way to rejuvenate your skin, look no further than the chamomile and avocado face mask. This combination not only hydrates the skin but also soothes irritation and reduces inflammation. I find it especially useful for anyone with dry or sensitive skin, as both ingredients pack a punch of nourishing benefits.

    To make this easy mask, you won’t need hard-to-find ingredients. Avocado is rich in essential vitamins and healthy fats that help lock in moisture, while chamomile adds calming properties, making this mask a delightful treat for your complexion. It’s straightforward to prepare, making it perfect for a quick at-home pampering session.

    In just a few steps, you can create a revitalizing face mask that leaves your skin feeling soft and refreshed. I’ll guide you through the ingredients and the simple recipe, ensuring you can enjoy the best of what nature has to offer right in your own kitchen.

    Gathering Ingredients

    Preparing an easy chamomile and avocado face mask requires selecting the right ingredients that work well together. Chamomile provides soothing properties, while avocado contributes moisture. Here are the key components to gather before starting your mask.

    Benefits of Chamomile

    Chamomile is celebrated for its calming effects on the skin. I like to use chamomile tea as it is convenient and effective. Its anti-inflammatory properties help reduce irritation and redness, making it suitable for sensitive skin.

    When using chamomile, I steep one tablespoon of dried chamomile flowers or tea bags in hot water and allow it to cool. This infusion can then serve as a liquid base in my mask. Chamomile is also packed with antioxidants, which help protect the skin from environmental stressors. This makes it a valuable ingredient for achieving a healthier complexion.

    Properties of Avocado Oil

    Avocado is rich in essential vitamins such as E and K, making it highly beneficial for skin health. I prefer using half of a ripe avocado in my mask prep. The fruit is known for its deep moisturizing properties, effectively nourishing dry skin.

    The fats in avocado also create a protective barrier that retains moisture. This makes it an excellent choice for combating dryness. It’s important to choose a ripe avocado, as it blends more easily. Ensure it is soft to the touch but not overly mushy, as this indicates peak ripeness.

    Choosing the Right Base for the Mask

    I typically incorporate honey as a natural binding agent in my mask. A tablespoon of honey not only retains moisture but also provides antibacterial benefits. It helps to soothe the skin while promoting a radiant glow.

    When preparing my face mask, I combine the chamomile infusion, avocado, and honey thoroughly to create a smooth consistency. This base is both hydrating and soothing, making it ideal for various skin types. I always make sure all ingredients are fresh and high quality for the best results.

    Preparing Your Face Mask

    Creating an effective chamomile and avocado face mask involves a few easy steps. I’ll guide you through mixing the ingredients, proper application techniques, and how often to use the mask for the best results.

    Mixing Your Ingredients

    To prepare the mask, I start with the main ingredients: half of a ripe avocado, one tablespoon of chamomile tea, and one tablespoon of honey.

    1. Prepare the Chamomile: Brew chamomile tea using hot water. Allow it to steep for about 5 minutes before removing the tea bag or straining the tea leaves. Let the tea cool.

    2. Mash the Avocado: In a mixing bowl, I mash the ripe avocado until it’s smooth and creamy.

    3. Combine Ingredients: Add the cooled chamomile tea to the mashed avocado. Mix in honey, which not only promotes hydration but also adds its soothing properties.

    Stir all ingredients until well-blended, ensuring a uniform consistency. This ensures that each application delivers the full benefit.

    Application Techniques

    For effective application, I follow these steps to ensure even coverage and optimal absorption:

    1. Cleanse Your Face: I start with a gentle cleanser to remove any dirt and makeup, preparing my skin for the mask.

    2. Use Clean Fingers or a Brush: I apply the mask using clean fingers or a makeup brush. This helps avoid any contamination and provides a smooth application.

    3. Even Distribution: I spread the mixture evenly across my face, avoiding the eye area. Using circular motions allows better penetration, and I make sure to cover all exposed areas.

    4. Layering: If desired, I can add another thin layer for added hydration, especially on dry patches.

    Duration and Frequency of Use

    I leave the mask on for about 10 to 20 minutes. This time frame allows my skin to absorb the nourishing properties of the ingredients effectively.

    • Rinse Off: I rinse my face with cool water, which helps close the pores and refreshes my skin.

    • Frequency: I find that using this mask 1 to 2 times a week is effective for maintaining hydration and softness.

    Listening to my skin is crucial; if it feels overly sensitive or irritated, I adjust the frequency accordingly.

    21 Best Diy Homemade Face Mask Recipes For Dry Skin

    We are on YouTube
    How to Make Your Skin GLOW with 3 Ingredients

✨ DIY Carrot Glow Cream Recipe
This recipe is designed to infuse your skin with the antioxidant power of carrots (beta-carotene) using just three core ingredients, as seen in your video.

🥕 Ingredients
Fresh Carrots (Grated)
Coconut Oil (For the oil infusion)
Aloe Vera Gel (For the cream base)

👩‍🍳 Step-by-Step Instructions
Roast the Carrots (Maximize Potency): Gently roast or dry the grated fresh carrots. This step helps to intensify and make the beta-carotene more accessible for extraction.

Infuse the Oil (Extract the Goodness): Place the roasted/dried carrots into a clean jar and cover them completely with coconut oil. Seal the jar and allow it to infuse, ideally overnight or longer, to extract the powerful antioxidants into the oil.

Strain the Oil (The Foundation): Carefully strain the oil mixture into a clean jar, separating the liquid (carrot oil) from the solids. This golden liquid is the foundation of your cream.

Create the Cream Base (Mix the Magic): Start with a dollop of pure aloe vera gel in a bowl.

Whisk and Transform: Slowly add the precise amount of your homemade carrot-infused oil to the aloe vera gel. Whisk the two ingredients together until they instantly transform into a smooth, vibrant orange cream.

🌟 Benefits
Vitamin A/Beta-Carotene: Carrots are rich in beta-carotene, a precursor to Vitamin A, which is known for promoting skin renewal and a healthy glow.

Moisture Lock: The combination of coconut oil and aloe vera helps to deeply hydrate and lock in moisture.

*Disclaimer: Always do a patch test before applying new products, especially DIY recipes, to your skin.*


Watch as we make a luxurious DIY carrot cream for a healthy, radiant complexion! This skincare diy uses natural ingredients to create a homemade skincare solution that's perfect for face care. We'll show you how to get glowing skin with this simple homemade recipes for a carrot body butter.
    I Made a Carrot Cream and My Skin Glows Now #skincare #natural #diy
    Watch how she transforms an empty Tree Hut Sugar Scrub jar into a viral DIY! 🤯 She didn't throw out her old jar—she refilled it from scratch with a homemade body scrub that looks even better than the original.

This DIY Tree Hut Scrub dupe is perfect for anyone looking for a skincare hack to save money and customize their exfoliation.

Ingredients used in the video:

Sugar
Ground Coffee
Body Wash (for a creamy base!)
Honey
Coconut Oil

Have you ever tried making your own body scrub? Let us know your favorite DIY skincare recipes in the comments!

#TreeHut #BodyScrub #DIYSkincare #SkincareHacks #TreeHutDupe #HomemadeScrub #BeautyHacks #Exfoliation #SelfCare #SugarScrub #YouTubeShorts #DIYBeauty

Watch as she creates a luxurious "homemade sugar scrub" right from her kitchen, reusing an old container. This "diy body scrub" combines simple ingredients for a fraction of the cost of store-bought versions, making it an ideal "body scrub at home". With this easy "sugar scrub for body", you can achieve incredibly smooth skin. It's a fantastic "diy projects" that shows you "how to make your skin smooth" naturally.
    Homemade Body Scrub That Looks Even Better Than Tree Hut #skincare
    DIY Moong Dal & Aloe Vera Face Mask for INSTANT GLOW! ✨

You won't believe the secret ingredient for **glowing skin**—it's **LENTILS** (specifically moong dal)! 🤯 Watch this quick DIY to see how she transformed simple kitchen ingredients into a powerful **natural face mask** for instant brightness.

In this short, she blended fine moong dal (split yellow lentils) into a powder, mixed it with soothing aloe vera gel, and a splash of water to create a creamy, natural beauty paste. This is your new go-to homemade glow mask!

**How to Use for Best Results:**
* Apply the mask evenly to your face.
* Leave it on for just **20 minutes**.
* Rinse thoroughly with **cold water** to close pores and lock in the brightness.

This quick DIY skincare hack uses traditional Indian beauty secrets (Ayurveda-inspired) to give you soft, bright, and glowing skin without harsh chemicals. Perfect for those looking for natural skincare routines and affordable beauty tips.

What do you think of this amazing hack? Let me know in the comments if you’ve tried a lentil mask before! 👇
👉 Like this video if you love natural beauty tips!
🔔 Subscribe for more easy DIYs and skincare hacks!

#diybeauty #skincarehacks #naturalbeauty #glowingskin #indianbeauty #moongdal #facepack #homemadefacemask #skincaretips #selfcare
    I Tried a DIY Lentil Face Mask and WOW! #skincare
    The #1 Natural Face Mask For Glowing Skin! ❤️ DIY Anti-Aging Recipe

Want brighter, younger-looking skin without expensive serums? This viral DIY face mask uses a surprisingly powerful ingredient: banana peels!

Watch the full short to learn how to make this simple, all-natural anti-aging remedy that also brightens and adds a gorgeous glow to your skin.

The 7-Day Challenge: Apply this mask every day for one week to see amazing results. It's packed with vitamins and antioxidants to help reduce the appearance of fine lines, wrinkles, and dark spots.

DIY Banana Peel Face Mask Recipe
What You'll Need:

1 Banana peel
2 tablespoons rice
200 ml of water
1 tablespoon milk powder
1 tablespoon cornstarch
1 tablespoon lemon juice

Instructions & Storage:

Boil the banana peel and rice in water until soft.

Blend the mixture until smooth.

Stir in the milk powder, cornstarch, and lemon juice.

Store in an airtight container in the refrigerator for up to 7 days.

👍 If you loved this natural skincare hack, hit the LIKE button and SUBSCRIBE for more easy DIY beauty recipes!

#DIYfaceMask #BananaPeelMask #AntiAgingMask #GlowingSkinHack #NaturalSkincare #RiceMask #DIYBeauty #YouTubeShorts #SkincareRoutine #WrinkleTreatment
    The #1 Natural Face Mask for Glowing Skin! ❤️ DIY Anti-Aging Recipe #skincare
    How to Make DIY Korean Flaxseed Mask for Skin Whitening (Natural Botox Effect!) 

Get the viral **"Natural Botox"** effect at home with this simple **DIY Korean flaxseed mask** recipe! This homemade treatment is famous for making skin look tighter, brighter, and deeply hydrated.

This short video shows you exactly how to make the best flaxseed gel mask using a simple addition—rice flour—for a powerful skin whitening and glass skin effect.

### ✨ Why this Mask Works:
* **Flaxseed Gel:** Rich in Omega-3s and antioxidants, it provides incredible hydration and creates a visible, temporary lift/tightening effect as it dries.
* **Rice Flour:** A key ingredient in Korean and Japanese skincare, known for its gentle brightening and skin-softening properties.

### 📋 Full Recipe Ingredients:
* 1 Cup Water
* 3 Tablespoons Whole Flaxseeds (Linseeds)
* 1 Tablespoon Rice Flour (or Cornstarch)

### 🌿 Quick Instructions:
1.  Boil water, flaxseeds, and rice flour.
2.  Stir continuously until it forms a thick, gelatinous paste (consistency shown in video).
3.  Cool completely. Apply thickly to face.
4.  Rinse off after 20-30 minutes for glowing, firm skin!

**➡️ Did you try this DIY face mask? Drop a comment below!**
👍 **Like and Subscribe for more easy natural skincare recipes and beauty hacks!**

#skincare #DIYMask #FlaxseedMask #NaturalBotox #KoreanSkincare #KBeauty #SkinWhitening #SkinFirming #AntiAgingTips #HomemadeSkincare #GlassSkin #RiceMask
    How to Make DIY Korean Flaxseed Mask for Skin Whitening (Natural Botox Effect!) #skincare
    Ultimate Blackhead Removal Hack! DIY Gelatin & Coffee Peel-Off Mask ☕️

Watch this satisfying mask detox your skin and remove blackheads, dead skin, and dirt! Get super smooth and fresh skin with this simple home remedy.

**✨ How to Make It:**
1. Scoop 1 part Gelatin, 1 part Coffee grounds, and a splash of Hot Water into a bowl.
2. Mix well until the gelatin dissolves and you have a thick, smooth paste.
3. Apply to your nose/t-zone and let it completely dry (about 15-20 minutes).
4. Slowly peel off the mask and see the results!

**⚠️ Note:** Always do a small patch test first. Do not use if you have sensitive or broken skin.

#shorts #blackheads #blackheadremoval #skincare #diyskincare #peeloffmask #satisfying #coffeemask #homeremedy #beautyhacks #skinroutine
    Ultimate Blackhead Removal Hack! DIY Gelatin & Coffee Peel Off Mask #skincare
    Load More... Subscribe
    Share. Facebook Twitter Pinterest LinkedIn Tumblr Email
    Hershey

    Hi, I’m Hershey — a lifelong natural skincare enthusiast with a love for creating simple, homemade beauty solutions that actually work. Inspired by my grandmother’s herbal remedies and my own sensitive skin journey, I started DIY Beauty Corner to share effective, affordable skincare recipes made from ingredients you already have at home.

    Related Posts

    DIY Homemade Oatmeal and Milk Face Mask

    April 2, 2025

    DIY Homemade Turmeric And Milk Face Mask: Easy Recipe for Glowing Skin

    February 23, 2025

    Easy DIY Homemade Shea Butter and Banana Hydrating Face Mask: A Simple Natural Skin Care Solution

    December 15, 2023

    Hi, I'm Hershey. I'm a skin care and beauty blogger who's NOT a morning person. (Seriously, who is?) I love making DIY skin care remedies from natural ingredients, and sharing my recipes and tips that can be used at home. Whether you're looking for ways to save money on your beauty routine, or just want to know how to take better care of your skin, you'll find something useful on my blog. So why not stick around for a while?

    Grandmas Homemade Face Mask Recipe

    Continue Reading
    DIY Beauty Corner

    Popular This Month

    • Sugar & Honey Body Scrub
    • Organic Body Butter
    • Korean Glass Skin Rice Mask
    • Turmeric Glow Body Scrub
    • Rosemary Hair Growth Oil
    • Quick Coffee Sugar Scrub
    • Vanilla & Brown Sugar Scrub
    • Pink Whipped Sugar Scrub
    • Non-Greasy Body Butter
    • Lemon Sugar Scrub

    Browse by DIY Recipe Type

    Body Scrub Recipes
    Face Mask Recipes
    Body Butter Recipes
    Hair Growth Recipes
    Lip Balm Recipes
    Perfume Recipes
    ⚠️ Please note: I’m not a licensed dermatologist or medical professional. All recipes shared are based on personal experience and research. Always perform a patch test before trying new skincare, and consult a healthcare provider for specific concerns.
    Pinterest YouTube
    • About
    • Contact
    • Disclaimer
    • Privacy Policy
    • Terms and Conditions
    © 2025 DIYBeautyCorner.com.

    Type above and press Enter to search. Press Esc to cancel.