Close Menu
Homemade Skincare Recipes and Beauty Tips
    Pinterest
    Trending
    • DIY Rosemary Water Hair Rinse
    • Brown Sugar & Coconut Oil Scrub
    • Oatmeal & Yogurt Soothing Scrub
    • Turmeric & Rice Flour Scrub for Dark Spots
    • Coffee & Sugar Scrub Recipe at Home
    • DIY Lemon & Honey Body Scrub for Bright Skin
    • How to Do a Skincare Patch Test
    • How to Make Rice Water Rinse for Hair Growth
    • About Us
    • Contact Us
    • Disclaimer
    • Privacy Policy
    • Terms
    Homemade Skincare Recipes and Beauty Tips
    • Home
    • DIY Body Scrub Recipes
    • DIY Face Mask Recipes
    • DIY Body Butter Recipes
    • DIY Hair Growth Recipes
    • DIY Lip Balm Recipes
    Homemade Skincare Recipes and Beauty Tips
    Home»DIY Homemade Bath Salts Recipes»DIY Homemade Geranium and Rock Salt Balancing Bath Salts with Essential Oils
    DIY Homemade Bath Salts Recipes

    DIY Homemade Geranium and Rock Salt Balancing Bath Salts with Essential Oils

    HersheyBy HersheyMay 29, 2024No Comments5 Mins Read
    Facebook Twitter Pinterest LinkedIn Tumblr Email
    Share
    Facebook Twitter LinkedIn Pinterest Email
    DIY Homemade Geranium and Rock Salt Balancing Bath Salts with Essential Oils

    Creating your own bath salts at home can be a rewarding and soothing experience. By combining geranium essential oil with rock salt, I can achieve a balancing and aromatic bath that elevates my self-care routine. These bath salts not only provide a relaxing atmosphere but also offer potential benefits for my skin and overall well-being.

    In this blog post, I will guide you through the simple steps to make DIY Homemade Geranium and Rock Salt Balancing Bath Salts. With just a few ingredients and minimal effort, I can enjoy a fragrant and therapeutic bath that promotes relaxation and rejuvenation. Whether I’m seeking to unwind after a long day or simply indulge in some personal pampering, this recipe is an excellent addition to my self-care repertoire.

    Join me as I explore the ingredients and the process to create these delightful bath salts. You’ll discover how easy it is to transform a regular bath into a spa-like experience right at home.

    Crafting Your Balancing Bath Salts

    Creating my own geranium and rock salt balancing bath salts is a simple and rewarding process. I enjoy gathering quality ingredients that enhance the bathing experience while taking care to follow each step carefully.

    Gathering Supplies

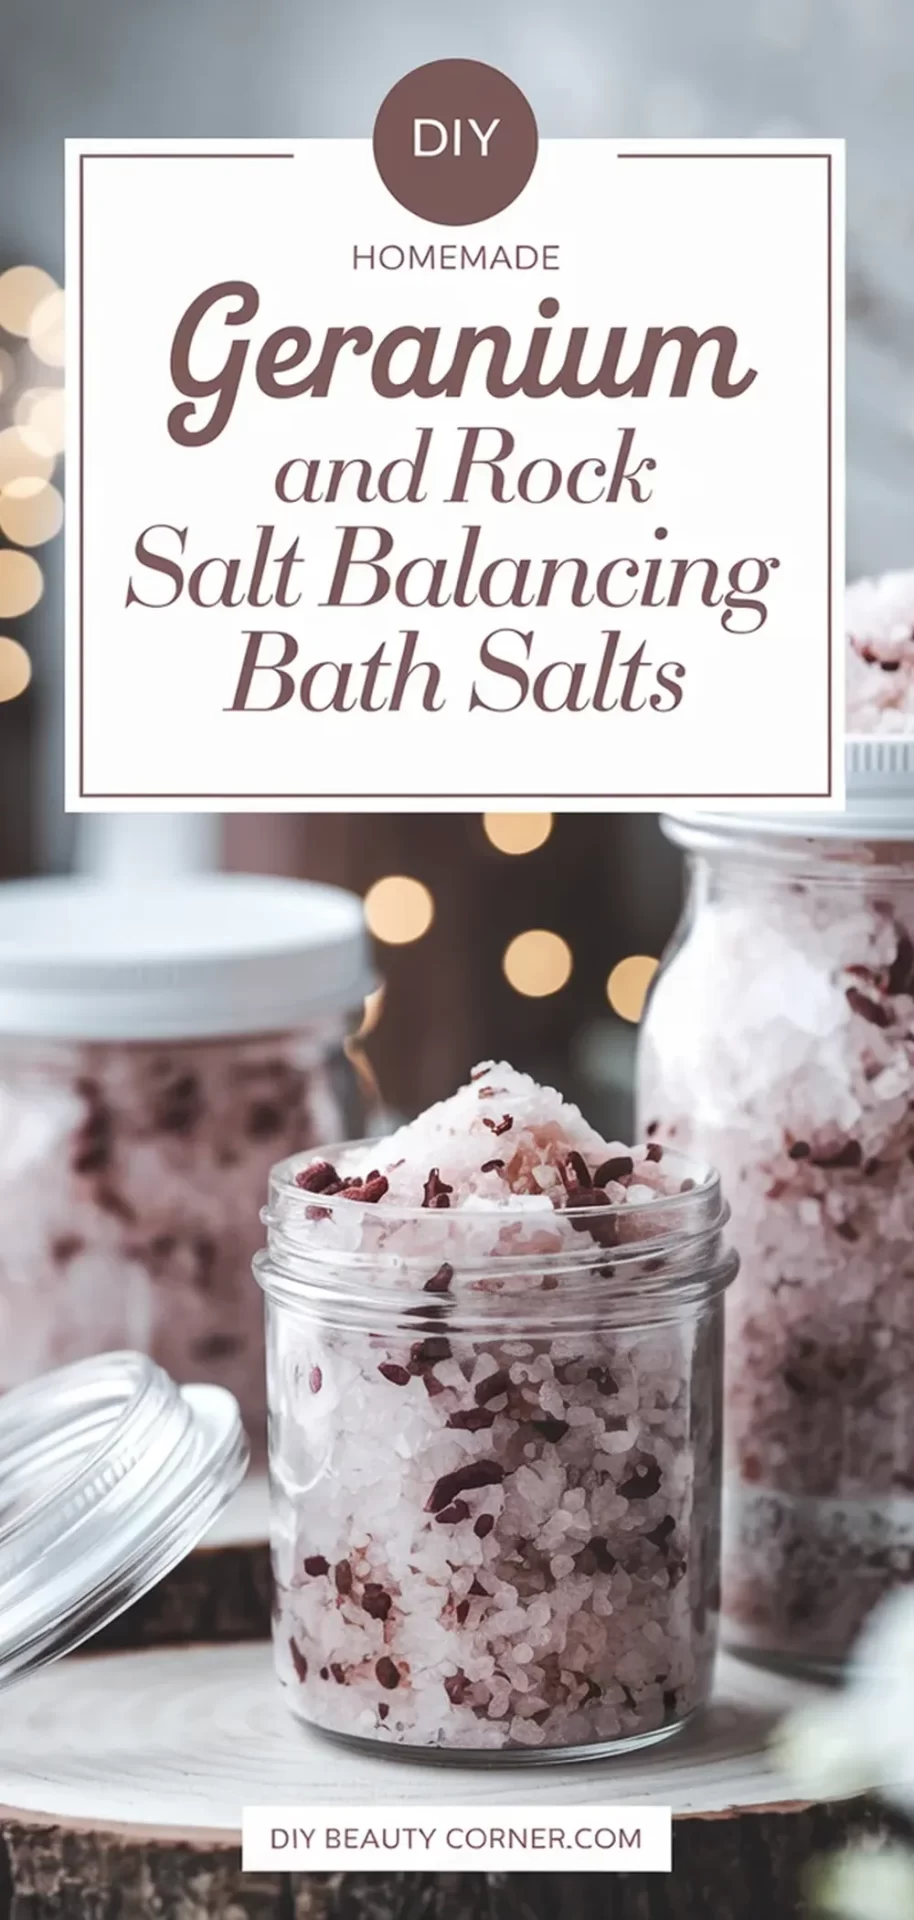
    The first step is to gather all necessary ingredients and tools. I need 1 cup of rock salt, 10 drops of geranium essential oil, and 1 tablespoon of carrier oil, such as sweet almond or coconut oil.

    In addition to these ingredients, I ensure I have a mixing bowl, a measuring spoon, and a spoon for mixing. Having everything organized beforehand helps streamline the crafting process. It’s also beneficial to choose a clean, dry workspace to prevent contamination and ensure the best quality of the bath salts.

    Selecting Quality Geranium Essential Oil

    Next, I focus on selecting a high-quality geranium essential oil. This ingredient is vital for its balancing properties and delightful aroma.

    When searching for the right oil, I look for products that are 100% pure, with no fillers or synthetic additives. Checking the label for GC/MS testing ensures that the oil has been rigorously analyzed for purity. I also aim for oils that are sustainably sourced, reflecting a commitment to both quality and environmental responsibility.

    Preparing Rock Salt

    Rock salt is a key component of the bath salts and serves as the base. I choose coarse rock salt, which dissolves well in warm water and can provide a gentle exfoliating effect.

    To prepare the rock salt, I measure 1 cup and place it in my mixing bowl. I take a moment to break up any large clumps, ensuring the salt is uniform and easy to mix. This step is important for even distribution of essential oils and ensures that all of the salt dissolves properly during bathing, creating a pleasant experience.

    Mixing Procedure

    In the mixing bowl, I start by adding the prepared rock salt. Then, I introduce 10 drops of geranium essential oil and 1 tablespoon of carrier oil to the bowl.

    Using a spoon, I mix the ingredients thoroughly, ensuring that the essential oil is evenly distributed throughout the salt. I take care to break up any clumps that may form, creating a cohesive mixture. Once everything is blended, I transfer the bath salts into an airtight container, where they can be stored in a cool, dark place, ready for my next relaxing bath.

    Benefits and Usage

    Using geranium essential oil and rock salt in homemade bath salts brings a range of therapeutic effects and enhances your bathing experience. I find that understanding the components can help in maximizing their benefits and optimizing their usage.

    Therapeutic Qualities of Geranium

    Geranium essential oil is known for its balancing and uplifting properties. It aids in reducing stress and anxiety, making it a suitable addition to my bath routine. The oil can promote emotional stability and soothe the senses, enhancing relaxation during a soak.

    To harness these benefits, I recommend using 10 drops of geranium oil per batch of bath salts. Additionally, geranium has anti-inflammatory and antibacterial qualities, contributing to healthier skin. Regular use can help alleviate skin irritations, providing a calming effect while detoxifying the body. This makes the bath not just a luxurious experience but a therapeutic one as well.

    Rock Salt’s Role in Balance

    Rock salt is an essential component for creating an effective balancing bath soak. It’s rich in minerals that can replenish the body’s natural salts, particularly magnesium. This mineral plays a crucial role in muscle relaxation and stress relief.

    When added to warm water, rock salt dissolves, helping to create an environment for deep cleansing of the skin. It also aids in detoxification, drawing out impurities through the skin. For my bath salts, I usually use 1 cup of rock salt as the base, benefiting from its natural healing properties. The synergy between rock salt and essential oils enhances the overall calming experience.

    Optimal Use of Bath Salts

    To enjoy the full benefits of my homemade geranium and rock salt bath salts, I suggest adding 1-2 cups of the mixture to a warm bath. Ensuring the water temperature is comfortable helps activate the properties of both the geranium oil and rock salt.

    For an ideal experience, soak for at least 20 minutes, allowing the minerals to absorb into your body. I also find that lighting a candle or adding soothing music can enhance the atmosphere, making it a more immersive relaxation ritual. Keeping the bath free from distractions helps to maximize the benefits of this soothing bath experience.

    21 Best Diy Homemade Floral Bath Salts Recipes

    We are on YouTube
    🚨 STOP! Just because it’s a traditional/viral hack doesn't mean it's safe. Mixing Lemon + Baking Soda for razor bumps is an alkaline/acid chemical reaction that can cause a severe burn and permanent scarring. We need to stop using kitchen ingredients on sensitive skin! Safe alternatives inside.

#razorbumps #razorburn #skincarefail #grandmahacks #diyskincare #chemicalburn #sensitiveskin #skincarescience #beautytok
    The Razor Bump Hack My Grandma Taught Me (🛑STOP Doing This!) #skincare
    Stop wasting money on travel size perfume! This easy DIY solid perfume hack uses Vaseline and your favorite scent to create a non-spill, long-lasting balm. 👉 FULL RECIPE IN THE PINNED COMMENT!

#shorts #perfumehack #solidperfume #DIYbeauty #Vaselinehack #longlastingperfume #cologne

Discover a simple yet effective perfume hack to make your favorite fragrance last all day! This video shows you how to combine perfume with vaseline to create a DIY solid perfume, perfect for on-the-go application. Learn how to make perfume that stays with you, offering long lasting perfumes and fragrance hacks for a lasting scent.
    🤯 How to Make Perfume Last 10x Longer #beautyhacks #perfumetrick #lifehack
    DIY TURMERIC MASK for GLASS SKIN (Actually Works!) 

Achieve the viral Glass Skin look at home with this simple, cost-effective DIY face mask! This natural recipe uses three potent ingredients to give your face an incredible glow, hydration, and softness.

✨ Why this mask works:

Turmeric (Cúrcuma): Known for its brightening properties to target dullness and even skin tone.

Cornstarch (Maicena): Helps soothe the skin and create a smooth mask texture.

Honey (Miel): A powerful natural humectant that draws in and locks moisture into the skin, keeping it supple.

Ingredients Needed:

2 Tbsp Cornstarch
2 Tbsp Turmeric Powder
1 Cup Honey (approx.)

Directions:

Mix the cornstarch and turmeric powder well.

Add honey and stir until you achieve a thick, smooth, golden paste.

Apply to a clean face and leave on for 15-20 minutes before rinsing.

#Shorts #DIYFaceMask #GlassSkin #TurmericMask #SkincareHacks #NaturalSkincare #HomemadeRemedies #BeautyHacks #Cúrcuma #Maicena #HoneyMask

Want that viral glass skin glow naturally? This easy DIY face mask combines cornstarch, turmeric, and honey to create a powerful skincare solution. This homemade face mask hydrates, softens, and gives you a vibrant, healthy glowing skin, perfect for your routine.
    🥰 DIY TURMERIC MASK for GLASS SKIN #skincare
    🤯 DIY Almond Mask for Glass Skin (It Actually Works!)

You won't believe how easy this is! 🧼 Tired of expensive serums? This simple, homemade skincare hack uses just two key ingredients—almonds and raw milk—to reveal an instant, visible glow.

The Secret: Soaked and peeled almonds are a gentle, natural source of Vitamin E and healthy fats, while raw milk provides lactic acid for mild, non-irritating exfoliation.

➡️ How to Get the Glow:

Soak 2 almonds overnight (or for a few hours).

Peel the skin off.

Grind the peeled almonds with a splash of raw milk until you get a thick, granular paste. (You can use a mortar and pestle or a small blender!)

Apply the paste to your face/wrist, rub gently for 30 seconds, and wipe off.

Watch the magic happen! ✨ Use this DIY face scrub 1-2 times a week for a brighter complexion, reduced tan, and that sought-after glass skin texture.

👍 Like & Save this video if you love natural beauty secrets! 🔔 Subscribe for more easy homemade skincare recipes!

#GlassSkin #DIYBeauty #AlmondMask #SkincareHacks #NaturalSkincare #HomemadeFaceMask #InstantBrightening #GlowUp #RawMilkBenefits #EasySkincare #Exfoliation #BeautyTips #IndianSkincare

Watch as she creates a luxurious "almond face pack" using ancient technology, transforming simple ingredients into a powerful "skincare routine" for instant "glowing skin". This natural skincare remedies video shows you "how to make" a traditional beauty paste, perfect for a soothing moment of self care. ✨
    🤯 DIY Almond Mask for Glass Skin (It Actually Works) #skincare
    How to Make Your Skin GLOW with 3 Ingredients

✨ DIY Carrot Glow Cream Recipe
This recipe is designed to infuse your skin with the antioxidant power of carrots (beta-carotene) using just three core ingredients, as seen in your video.

🥕 Ingredients
Fresh Carrots (Grated)
Coconut Oil (For the oil infusion)
Aloe Vera Gel (For the cream base)

👩‍🍳 Step-by-Step Instructions
Roast the Carrots (Maximize Potency): Gently roast or dry the grated fresh carrots. This step helps to intensify and make the beta-carotene more accessible for extraction.

Infuse the Oil (Extract the Goodness): Place the roasted/dried carrots into a clean jar and cover them completely with coconut oil. Seal the jar and allow it to infuse, ideally overnight or longer, to extract the powerful antioxidants into the oil.

Strain the Oil (The Foundation): Carefully strain the oil mixture into a clean jar, separating the liquid (carrot oil) from the solids. This golden liquid is the foundation of your cream.

Create the Cream Base (Mix the Magic): Start with a dollop of pure aloe vera gel in a bowl.

Whisk and Transform: Slowly add the precise amount of your homemade carrot-infused oil to the aloe vera gel. Whisk the two ingredients together until they instantly transform into a smooth, vibrant orange cream.

🌟 Benefits
Vitamin A/Beta-Carotene: Carrots are rich in beta-carotene, a precursor to Vitamin A, which is known for promoting skin renewal and a healthy glow.

Moisture Lock: The combination of coconut oil and aloe vera helps to deeply hydrate and lock in moisture.

*Disclaimer: Always do a patch test before applying new products, especially DIY recipes, to your skin.*


Watch as we make a luxurious DIY carrot cream for a healthy, radiant complexion! This skincare diy uses natural ingredients to create a homemade skincare solution that's perfect for face care. We'll show you how to get glowing skin with this simple homemade recipes for a carrot body butter.
    I Made a Carrot Cream and My Skin Glows Now #skincare #natural #diy
    Watch how she transforms an empty Tree Hut Sugar Scrub jar into a viral DIY! 🤯 She didn't throw out her old jar—she refilled it from scratch with a homemade body scrub that looks even better than the original.

This DIY Tree Hut Scrub dupe is perfect for anyone looking for a skincare hack to save money and customize their exfoliation.

Ingredients used in the video:

Sugar
Ground Coffee
Body Wash (for a creamy base!)
Honey
Coconut Oil

Have you ever tried making your own body scrub? Let us know your favorite DIY skincare recipes in the comments!

#TreeHut #BodyScrub #DIYSkincare #SkincareHacks #TreeHutDupe #HomemadeScrub #BeautyHacks #Exfoliation #SelfCare #SugarScrub #YouTubeShorts #DIYBeauty

Watch as she creates a luxurious "homemade sugar scrub" right from her kitchen, reusing an old container. This "diy body scrub" combines simple ingredients for a fraction of the cost of store-bought versions, making it an ideal "body scrub at home". With this easy "sugar scrub for body", you can achieve incredibly smooth skin. It's a fantastic "diy projects" that shows you "how to make your skin smooth" naturally.
    Homemade Body Scrub That Looks Even Better Than Tree Hut #skincare
    Load More... Subscribe
    Share. Facebook Twitter Pinterest LinkedIn Tumblr Email
    Hershey

    Hi, I’m Hershey — a lifelong natural skincare enthusiast with a love for creating simple, homemade beauty solutions that actually work. Inspired by my grandmother’s herbal remedies and my own sensitive skin journey, I started DIY Beauty Corner to share effective, affordable skincare recipes made from ingredients you already have at home.

    Related Posts

    DIY Homemade Elderflower and Mineral Salt Brightening Bath Salts

    January 26, 2023

    DIY Homemade Lilac and Magnesium Flakes Relaxing Bath Salts for Ultimate Stress Relief

    December 8, 2022

    DIY Homemade Spa Day – Create Rejuvenating Bath Salts with Jasmine and Pink Salt

    September 21, 2022

    Hi, I'm Hershey. I'm a skin care and beauty blogger who's NOT a morning person. (Seriously, who is?) I love making DIY skin care remedies from natural ingredients, and sharing my recipes and tips that can be used at home. Whether you're looking for ways to save money on your beauty routine, or just want to know how to take better care of your skin, you'll find something useful on my blog. So why not stick around for a while?

    Grandmas Homemade Face Mask Recipe

    Continue Reading
    DIY Beauty Corner

    Popular This Month

    • Sugar & Honey Body Scrub
    • Organic Body Butter
    • Korean Glass Skin Rice Mask
    • Turmeric Glow Body Scrub
    • Rosemary Hair Growth Oil
    • Quick Coffee Sugar Scrub
    • Vanilla & Brown Sugar Scrub
    • Pink Whipped Sugar Scrub
    • Non-Greasy Body Butter
    • Lemon Sugar Scrub

    Browse by DIY Recipe Type

    Body Scrub Recipes
    Face Mask Recipes
    Body Butter Recipes
    Hair Growth Recipes
    Lip Balm Recipes
    Perfume Recipes
    ⚠️ Please note: I’m not a licensed dermatologist or medical professional. All recipes shared are based on personal experience and research. Always perform a patch test before trying new skincare, and consult a healthcare provider for specific concerns.
    Pinterest YouTube
    • About
    • Contact
    • Disclaimer
    • Privacy Policy
    • Terms and Conditions
    © 2025 DIYBeautyCorner.com.

    Type above and press Enter to search. Press Esc to cancel.