Close Menu
Homemade Skincare Recipes and Beauty Tips
    Pinterest
    Trending
    • DIY Rosemary Water Hair Rinse
    • Brown Sugar & Coconut Oil Scrub
    • Oatmeal & Yogurt Soothing Scrub
    • Turmeric & Rice Flour Scrub for Dark Spots
    • Coffee & Sugar Scrub Recipe at Home
    • DIY Lemon & Honey Body Scrub for Bright Skin
    • How to Do a Skincare Patch Test
    • How to Make Rice Water Rinse for Hair Growth
    • About Us
    • Contact Us
    • Disclaimer
    • Privacy Policy
    • Terms
    Homemade Skincare Recipes and Beauty Tips
    • Home
    • DIY Body Scrub Recipes
    • DIY Face Mask Recipes
    • DIY Body Butter Recipes
    • DIY Hair Growth Recipes
    • DIY Lip Balm Recipes
    Homemade Skincare Recipes and Beauty Tips
    Home»DIY Homemade Face Mask Recipes»DIY Homemade Kiwi and Olive Oil Antioxidant Face Mask – Quick and Simple 2-Ingredient Recipe
    DIY Homemade Face Mask Recipes

    DIY Homemade Kiwi and Olive Oil Antioxidant Face Mask – Quick and Simple 2-Ingredient Recipe

    HersheyBy HersheyApril 16, 2023No Comments5 Mins Read
    Facebook Twitter Pinterest LinkedIn Tumblr Email
    Share
    Facebook Twitter LinkedIn Pinterest Email
    DIY Homemade Kiwi and Olive Oil Antioxidant Face Mask - Quick and Simple 2-Ingredient Recipe

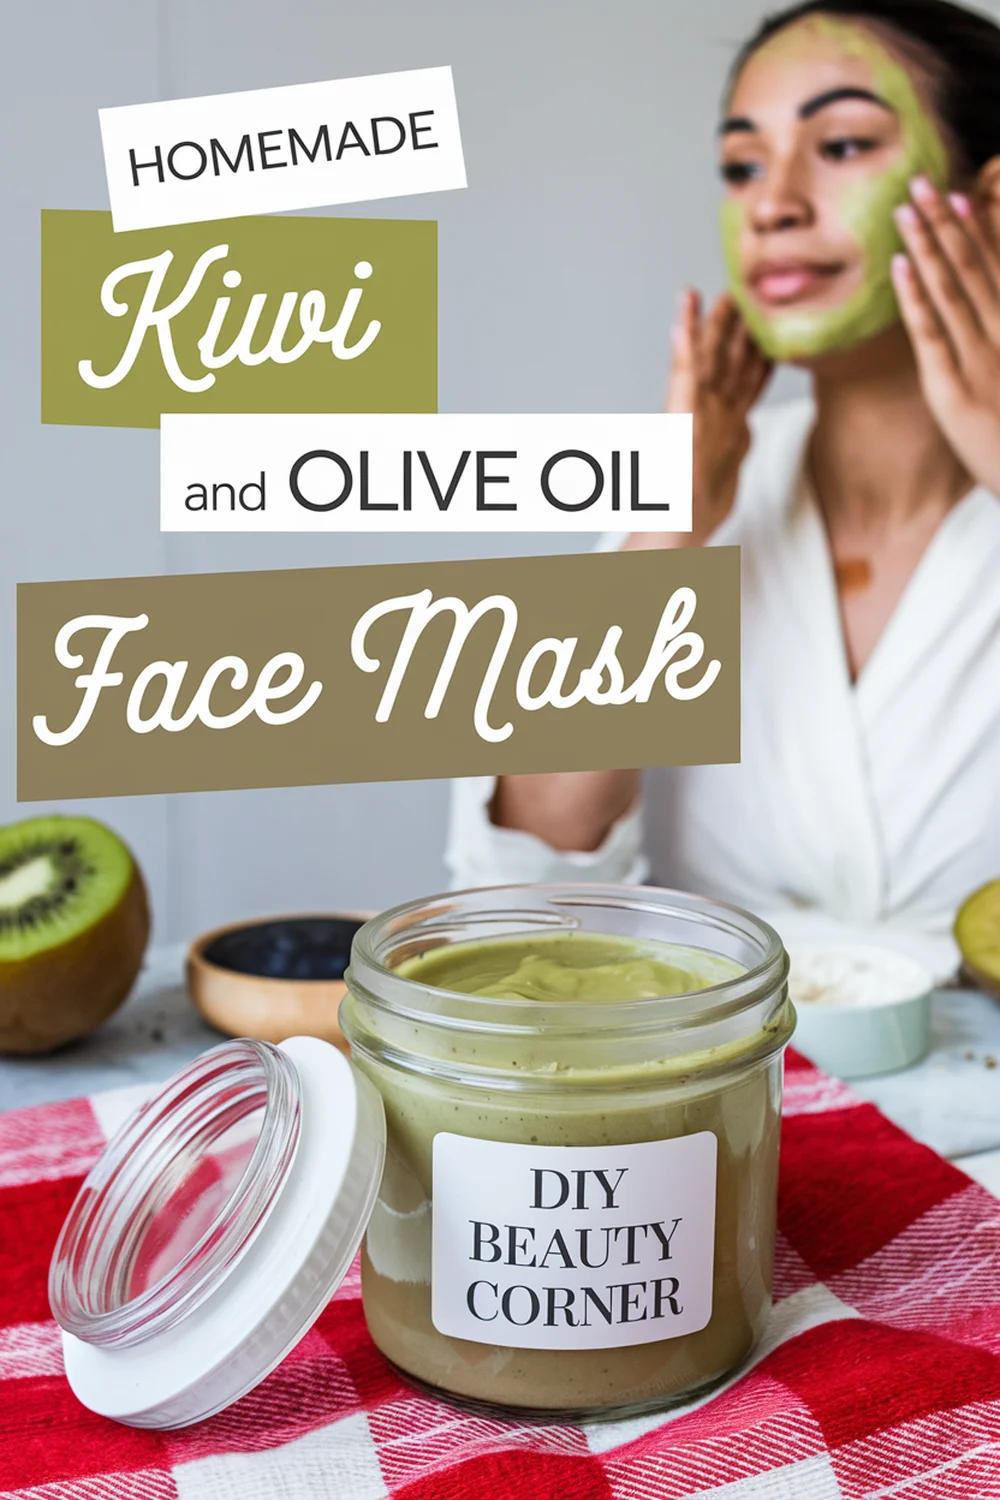
    I love experimenting with natural skincare, and one of my favorite recipes is the DIY Homemade Kiwi and Olive Oil Antioxidant Face Mask. This simple two-ingredient mask is not only easy to make but also packed with antioxidants that can nourish and rejuvenate your skin. Kiwi is rich in vitamin C, which helps brighten the complexion, while olive oil provides deep hydration and supports skin repair.

    To create this refreshing mask, I simply combine ripe kiwi and high-quality olive oil. The process is quick and straightforward, making it perfect for a last-minute skincare boost. Applying this mask regularly can lead to softer, more radiant skin, making it an essential addition to my beauty routine.

    With just these two ingredients, you can harness the power of nature for your skincare needs. Join me as I share the complete ingredients list and step-by-step instructions to recreate this rejuvenating face mask at home.

    Crafting Your Kiwi and Olive Oil Face Mask

    Creating a kiwi and olive oil face mask is a straightforward process that combines the nourishing properties of both ingredients. This mask can provide essential antioxidants for the skin while being easy to prepare. Below, I’ll detail the benefits of each component and guide you through the preparation process.

    Benefits of Kiwi for Skin

    Kiwi is rich in vitamin C, which plays a vital role in collagen production, contributing to skin firmness and elasticity. The antioxidants found in kiwi help combat free radicals, reducing the signs of aging.

    Additionally, kiwi contains natural acids that gently exfoliate the skin, promoting a brighter complexion. The fruit’s hydrating properties also assist in maintaining moisture levels, making it suitable for various skin types. Regular use can help address issues such as dullness and uneven texture, giving my skin a fresh and revitalized appearance.

    The Role of Olive Oil in Skin Health

    Extra virgin olive oil is celebrated for its numerous skin benefits, primarily due to its high content of monounsaturated fats and antioxidants. It acts as a natural moisturizer, forming a barrier on the skin to lock in hydration. This is particularly beneficial for dry skin, as it helps prevent moisture loss.

    Olive oil also has anti-inflammatory properties that can soothe irritated skin and reduce redness. Furthermore, it contains vitamins E and K, which play important roles in skin health by promoting healing and protecting against sun damage. This oil enhances the emollient quality of my face mask, creating a rich, luxurious treatment.

    Preparing Your Ingredients

    To prepare my kiwi and olive oil face mask, I start by selecting a ripe kiwi. It should yield slightly when pressed, indicating optimal softness for blending. Next, I wash the kiwi thoroughly to remove any impurities.

    I peel the kiwi and cut it into smaller pieces to make blending easier. In a blender or food processor, I purée the fruit until it reaches a smooth consistency. I measure out one tablespoon of extra virgin olive oil, ensuring it is high-quality for the best skin benefits.

    Combining Kiwi and Olive Oil

    Once I have my ingredients ready, I combine the kiwi puree and olive oil in a clean bowl. I mix them well until the two ingredients form a consistent paste. The texture should be creamy and easy to apply, without being too runny.

    After thoroughly mixing, I am ready to apply the mask. I ensure that my face is clean and slightly damp for better absorption. Using clean fingers or a brush, I spread the mask evenly across my face, avoiding the eye area. I leave it on for about 15 to 20 minutes before rinsing it off with lukewarm water.

    This simple yet effective mask can easily fit into my skincare routine, offering a refreshing and natural treat for the skin.

    Applying and Using Your Antioxidant Mask

    Applying a homemade kiwi and olive oil antioxidant face mask is straightforward and can enhance your skincare routine. I ensure that the process is both effective and enjoyable by focusing on the application technique, frequency, and post-care tips.

    Steps for Application

    1. Prepare Your Skin: Before application, I cleanse my face thoroughly to remove dirt and oils. A gentle exfoliation helps too, as it allows for better absorption of the mask.

    2. Create the Mask: I blend 1 ripe kiwi until smooth, then mix in 1 tablespoon of extra virgin olive oil. This combination forms a paste that is easy to apply.

    3. Apply the Mask: Using clean fingertips, I spread the mask evenly across my face, avoiding the eye area. I usually apply a thick layer for optimal coverage.

    4. Allow to Set: I let the mask sit for about 15 minutes while I relax. During this time, I find it beneficial to lie down to prevent any accidental smudging.

    5. Rinse Off: After the time is up, I rinse my face with lukewarm water. Patting my skin dry gently completes the application process.

    Frequency and Duration of Use

    I typically use this antioxidant mask once a week. This frequency helps my skin reap the benefits without overwhelming it. If I’m experiencing unusual dryness or irritation, I may adjust the frequency based on how my skin responds.

    Each application takes about 20-25 minutes, including preparation and rinsing. This time investment is manageable and worthwhile, as I notice my skin feels refreshed and looks revitalized after each use.

    Post-Application Skin Care Tips

    After using the kiwi and olive oil mask, I follow a few skin care practices to maintain optimal results. First, I apply a hydrating toner to restore balance to my skin.

    Next, I use a lightweight moisturizer to lock in hydration. Choosing a product with antioxidants enhances the benefits I gained from the mask.

    Lastly, I always apply sunscreen if I’m heading out, as my skin can be more sensitive to sunlight after treatment. This extra care ensures that I protect my rejuvenated skin effectively.

    21 Best Diy Homemade Face Mask Recipes For Dry Skin

    We are on YouTube
    How to Make Your Skin GLOW with 3 Ingredients

✨ DIY Carrot Glow Cream Recipe
This recipe is designed to infuse your skin with the antioxidant power of carrots (beta-carotene) using just three core ingredients, as seen in your video.

🥕 Ingredients
Fresh Carrots (Grated)
Coconut Oil (For the oil infusion)
Aloe Vera Gel (For the cream base)

👩‍🍳 Step-by-Step Instructions
Roast the Carrots (Maximize Potency): Gently roast or dry the grated fresh carrots. This step helps to intensify and make the beta-carotene more accessible for extraction.

Infuse the Oil (Extract the Goodness): Place the roasted/dried carrots into a clean jar and cover them completely with coconut oil. Seal the jar and allow it to infuse, ideally overnight or longer, to extract the powerful antioxidants into the oil.

Strain the Oil (The Foundation): Carefully strain the oil mixture into a clean jar, separating the liquid (carrot oil) from the solids. This golden liquid is the foundation of your cream.

Create the Cream Base (Mix the Magic): Start with a dollop of pure aloe vera gel in a bowl.

Whisk and Transform: Slowly add the precise amount of your homemade carrot-infused oil to the aloe vera gel. Whisk the two ingredients together until they instantly transform into a smooth, vibrant orange cream.

🌟 Benefits
Vitamin A/Beta-Carotene: Carrots are rich in beta-carotene, a precursor to Vitamin A, which is known for promoting skin renewal and a healthy glow.

Moisture Lock: The combination of coconut oil and aloe vera helps to deeply hydrate and lock in moisture.

*Disclaimer: Always do a patch test before applying new products, especially DIY recipes, to your skin.*


Watch as we make a luxurious DIY carrot cream for a healthy, radiant complexion! This skincare diy uses natural ingredients to create a homemade skincare solution that's perfect for face care. We'll show you how to get glowing skin with this simple homemade recipes for a carrot body butter.
    I Made a Carrot Cream and My Skin Glows Now #skincare #natural #diy
    Watch how she transforms an empty Tree Hut Sugar Scrub jar into a viral DIY! 🤯 She didn't throw out her old jar—she refilled it from scratch with a homemade body scrub that looks even better than the original.

This DIY Tree Hut Scrub dupe is perfect for anyone looking for a skincare hack to save money and customize their exfoliation.

Ingredients used in the video:

Sugar
Ground Coffee
Body Wash (for a creamy base!)
Honey
Coconut Oil

Have you ever tried making your own body scrub? Let us know your favorite DIY skincare recipes in the comments!

#TreeHut #BodyScrub #DIYSkincare #SkincareHacks #TreeHutDupe #HomemadeScrub #BeautyHacks #Exfoliation #SelfCare #SugarScrub #YouTubeShorts #DIYBeauty

Watch as she creates a luxurious "homemade sugar scrub" right from her kitchen, reusing an old container. This "diy body scrub" combines simple ingredients for a fraction of the cost of store-bought versions, making it an ideal "body scrub at home". With this easy "sugar scrub for body", you can achieve incredibly smooth skin. It's a fantastic "diy projects" that shows you "how to make your skin smooth" naturally.
    Homemade Body Scrub That Looks Even Better Than Tree Hut #skincare
    DIY Moong Dal & Aloe Vera Face Mask for INSTANT GLOW! ✨

You won't believe the secret ingredient for **glowing skin**—it's **LENTILS** (specifically moong dal)! 🤯 Watch this quick DIY to see how she transformed simple kitchen ingredients into a powerful **natural face mask** for instant brightness.

In this short, she blended fine moong dal (split yellow lentils) into a powder, mixed it with soothing aloe vera gel, and a splash of water to create a creamy, natural beauty paste. This is your new go-to homemade glow mask!

**How to Use for Best Results:**
* Apply the mask evenly to your face.
* Leave it on for just **20 minutes**.
* Rinse thoroughly with **cold water** to close pores and lock in the brightness.

This quick DIY skincare hack uses traditional Indian beauty secrets (Ayurveda-inspired) to give you soft, bright, and glowing skin without harsh chemicals. Perfect for those looking for natural skincare routines and affordable beauty tips.

What do you think of this amazing hack? Let me know in the comments if you’ve tried a lentil mask before! 👇
👉 Like this video if you love natural beauty tips!
🔔 Subscribe for more easy DIYs and skincare hacks!

#diybeauty #skincarehacks #naturalbeauty #glowingskin #indianbeauty #moongdal #facepack #homemadefacemask #skincaretips #selfcare
    I Tried a DIY Lentil Face Mask and WOW! #skincare
    The #1 Natural Face Mask For Glowing Skin! ❤️ DIY Anti-Aging Recipe

Want brighter, younger-looking skin without expensive serums? This viral DIY face mask uses a surprisingly powerful ingredient: banana peels!

Watch the full short to learn how to make this simple, all-natural anti-aging remedy that also brightens and adds a gorgeous glow to your skin.

The 7-Day Challenge: Apply this mask every day for one week to see amazing results. It's packed with vitamins and antioxidants to help reduce the appearance of fine lines, wrinkles, and dark spots.

DIY Banana Peel Face Mask Recipe
What You'll Need:

1 Banana peel
2 tablespoons rice
200 ml of water
1 tablespoon milk powder
1 tablespoon cornstarch
1 tablespoon lemon juice

Instructions & Storage:

Boil the banana peel and rice in water until soft.

Blend the mixture until smooth.

Stir in the milk powder, cornstarch, and lemon juice.

Store in an airtight container in the refrigerator for up to 7 days.

👍 If you loved this natural skincare hack, hit the LIKE button and SUBSCRIBE for more easy DIY beauty recipes!

#DIYfaceMask #BananaPeelMask #AntiAgingMask #GlowingSkinHack #NaturalSkincare #RiceMask #DIYBeauty #YouTubeShorts #SkincareRoutine #WrinkleTreatment
    The #1 Natural Face Mask for Glowing Skin! ❤️ DIY Anti-Aging Recipe #skincare
    How to Make DIY Korean Flaxseed Mask for Skin Whitening (Natural Botox Effect!) 

Get the viral **"Natural Botox"** effect at home with this simple **DIY Korean flaxseed mask** recipe! This homemade treatment is famous for making skin look tighter, brighter, and deeply hydrated.

This short video shows you exactly how to make the best flaxseed gel mask using a simple addition—rice flour—for a powerful skin whitening and glass skin effect.

### ✨ Why this Mask Works:
* **Flaxseed Gel:** Rich in Omega-3s and antioxidants, it provides incredible hydration and creates a visible, temporary lift/tightening effect as it dries.
* **Rice Flour:** A key ingredient in Korean and Japanese skincare, known for its gentle brightening and skin-softening properties.

### 📋 Full Recipe Ingredients:
* 1 Cup Water
* 3 Tablespoons Whole Flaxseeds (Linseeds)
* 1 Tablespoon Rice Flour (or Cornstarch)

### 🌿 Quick Instructions:
1.  Boil water, flaxseeds, and rice flour.
2.  Stir continuously until it forms a thick, gelatinous paste (consistency shown in video).
3.  Cool completely. Apply thickly to face.
4.  Rinse off after 20-30 minutes for glowing, firm skin!

**➡️ Did you try this DIY face mask? Drop a comment below!**
👍 **Like and Subscribe for more easy natural skincare recipes and beauty hacks!**

#skincare #DIYMask #FlaxseedMask #NaturalBotox #KoreanSkincare #KBeauty #SkinWhitening #SkinFirming #AntiAgingTips #HomemadeSkincare #GlassSkin #RiceMask
    How to Make DIY Korean Flaxseed Mask for Skin Whitening (Natural Botox Effect!) #skincare
    Ultimate Blackhead Removal Hack! DIY Gelatin & Coffee Peel-Off Mask ☕️

Watch this satisfying mask detox your skin and remove blackheads, dead skin, and dirt! Get super smooth and fresh skin with this simple home remedy.

**✨ How to Make It:**
1. Scoop 1 part Gelatin, 1 part Coffee grounds, and a splash of Hot Water into a bowl.
2. Mix well until the gelatin dissolves and you have a thick, smooth paste.
3. Apply to your nose/t-zone and let it completely dry (about 15-20 minutes).
4. Slowly peel off the mask and see the results!

**⚠️ Note:** Always do a small patch test first. Do not use if you have sensitive or broken skin.

#shorts #blackheads #blackheadremoval #skincare #diyskincare #peeloffmask #satisfying #coffeemask #homeremedy #beautyhacks #skinroutine
    Ultimate Blackhead Removal Hack! DIY Gelatin & Coffee Peel Off Mask #skincare
    Load More... Subscribe
    Share. Facebook Twitter Pinterest LinkedIn Tumblr Email
    Hershey

    Hi, I’m Hershey — a lifelong natural skincare enthusiast with a love for creating simple, homemade beauty solutions that actually work. Inspired by my grandmother’s herbal remedies and my own sensitive skin journey, I started DIY Beauty Corner to share effective, affordable skincare recipes made from ingredients you already have at home.

    Related Posts

    DIY Homemade Oatmeal and Milk Face Mask

    April 2, 2025

    DIY Homemade Turmeric And Milk Face Mask: Easy Recipe for Glowing Skin

    February 23, 2025

    Easy DIY Homemade Shea Butter and Banana Hydrating Face Mask: A Simple Natural Skin Care Solution

    December 15, 2023

    Hi, I'm Hershey. I'm a skin care and beauty blogger who's NOT a morning person. (Seriously, who is?) I love making DIY skin care remedies from natural ingredients, and sharing my recipes and tips that can be used at home. Whether you're looking for ways to save money on your beauty routine, or just want to know how to take better care of your skin, you'll find something useful on my blog. So why not stick around for a while?

    Grandmas Homemade Face Mask Recipe

    Continue Reading
    DIY Beauty Corner

    Popular This Month

    • Sugar & Honey Body Scrub
    • Organic Body Butter
    • Korean Glass Skin Rice Mask
    • Turmeric Glow Body Scrub
    • Rosemary Hair Growth Oil
    • Quick Coffee Sugar Scrub
    • Vanilla & Brown Sugar Scrub
    • Pink Whipped Sugar Scrub
    • Non-Greasy Body Butter
    • Lemon Sugar Scrub

    Browse by DIY Recipe Type

    Body Scrub Recipes
    Face Mask Recipes
    Body Butter Recipes
    Hair Growth Recipes
    Lip Balm Recipes
    Perfume Recipes
    ⚠️ Please note: I’m not a licensed dermatologist or medical professional. All recipes shared are based on personal experience and research. Always perform a patch test before trying new skincare, and consult a healthcare provider for specific concerns.
    Pinterest YouTube
    • About
    • Contact
    • Disclaimer
    • Privacy Policy
    • Terms and Conditions
    © 2025 DIYBeautyCorner.com.

    Type above and press Enter to search. Press Esc to cancel.