Close Menu
Homemade Skincare Recipes and Beauty Tips
    Pinterest
    Trending
    • DIY Rosemary Water Hair Rinse
    • Brown Sugar & Coconut Oil Scrub
    • Oatmeal & Yogurt Soothing Scrub
    • Turmeric & Rice Flour Scrub for Dark Spots
    • Coffee & Sugar Scrub Recipe at Home
    • DIY Lemon & Honey Body Scrub for Bright Skin
    • How to Do a Skincare Patch Test
    • How to Make Rice Water Rinse for Hair Growth
    • About Us
    • Contact Us
    • Disclaimer
    • Privacy Policy
    • Terms
    Homemade Skincare Recipes and Beauty Tips
    • Home
    • DIY Body Scrub Recipes
    • DIY Face Mask Recipes
    • DIY Body Butter Recipes
    • DIY Hair Growth Recipes
    • DIY Lip Balm Recipes
    Homemade Skincare Recipes and Beauty Tips
    Home»DIY Homemade Perfume Recipes»Easy Homemade Sweet Vanilla Citrus Perfume Recipe
    DIY Homemade Perfume Recipes

    Easy Homemade Sweet Vanilla Citrus Perfume Recipe

    HersheyBy HersheyApril 11, 2023No Comments4 Mins Read
    Facebook Twitter Pinterest LinkedIn Tumblr Email
    Share
    Facebook Twitter LinkedIn Pinterest Email
    Easy Homemade Sweet Vanilla Citrus Perfume Recipe

    Creating your own fragrance at home can be a delightful and fulfilling experience, especially when it involves the sweet and refreshing essence of vanilla and citrus. I’m excited to share an easy homemade recipe that captures that perfect blend, allowing you to enjoy a unique scent tailored to your personal taste. This simple recipe not only lets you customize your fragrance but also provides a beautiful, natural alternative to store-bought perfumes.

    In this blog post, I will guide you through the steps to craft a Sweet Vanilla Citrus Perfume using easily accessible ingredients. From selecting essential oils to mixing your blend, I’ll provide clear measurements and tips to ensure your perfume turns out just right. Whether you’re looking to elevate your scent collection or create a thoughtful gift, I believe you’ll find this process both enjoyable and rewarding.

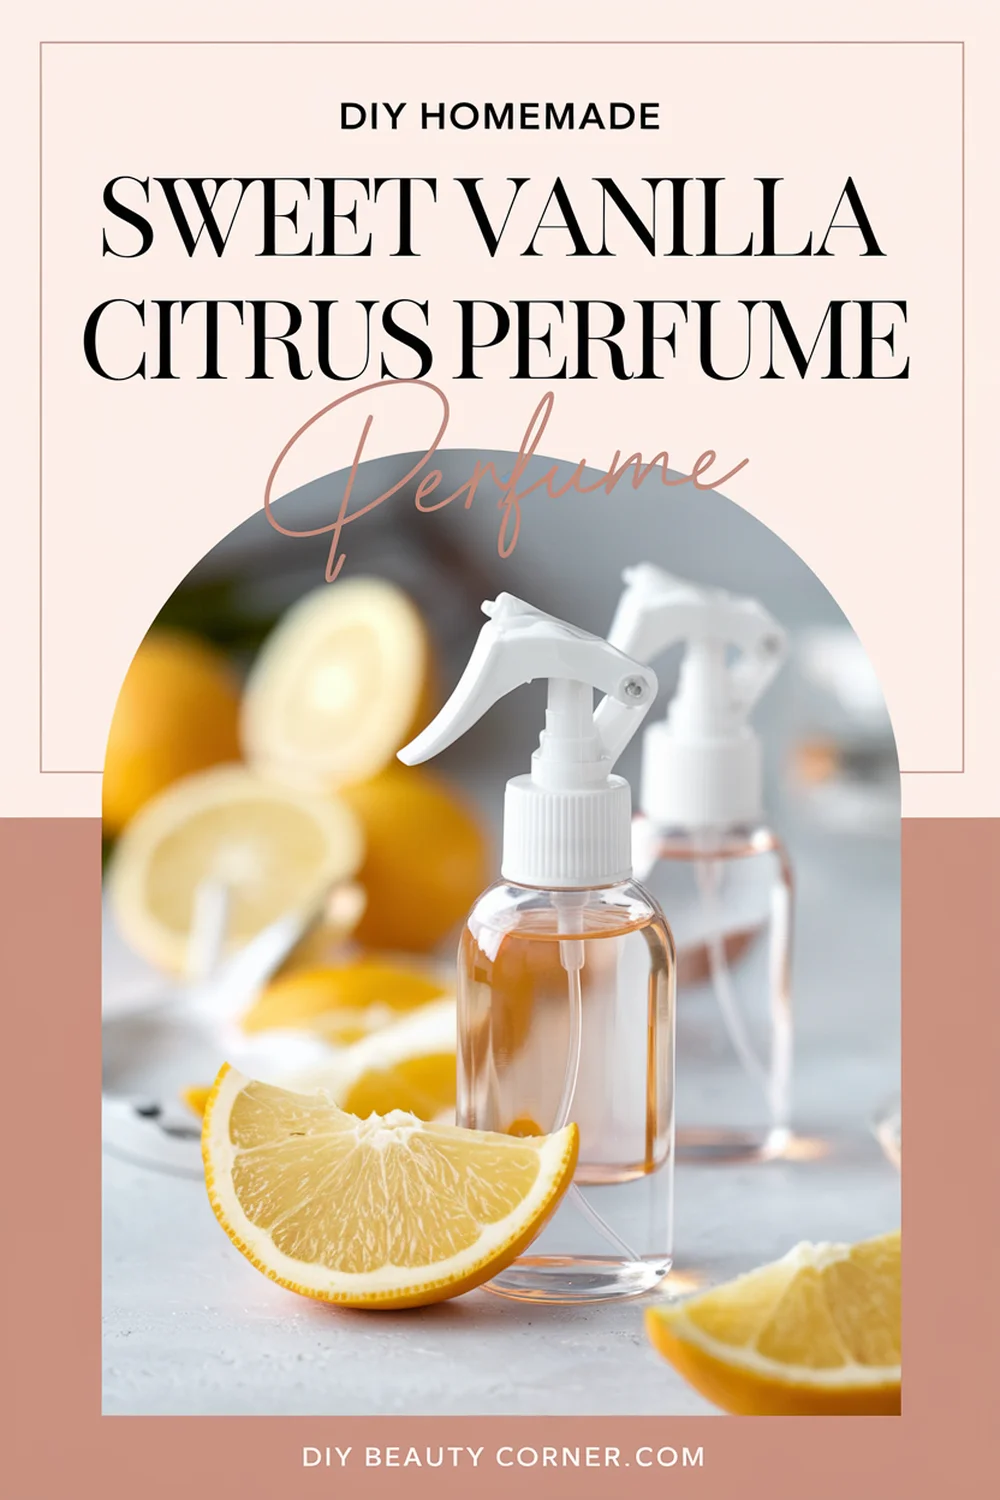
    Crafting Your Sweet Vanilla Citrus Perfume

    Creating a homemade Sweet Vanilla Citrus perfume is an enjoyable process that allows for personalization while ensuring freshness. This recipe balances the warm, comforting notes of vanilla with the bright, zesty aromas of citrus, resulting in a delightful fragrance perfect for any occasion.

    Gathering High-Quality Ingredients

    To craft this signature scent, I focus on using high-quality essential oils and a suitable carrier oil. The essential oils include:

    • 15 drops vanilla essential oil: This forms the warm base of my fragrance.
    • 10 drops sweet orange essential oil: This adds a bright, uplifting note.
    • 5 drops bergamot essential oil: I use this for its fresh and slightly floral aspect.
    • 3 drops lemon essential oil: This contributes an invigorating twist.

    I choose 2 tablespoons of jojoba oil or fractionated coconut oil as my carrier, which dilutes the essential oils, allowing them to blend effectively while being gentle on the skin. It’s essential to ensure all ingredients are pure and high-quality to achieve the best scent.

    Understanding Perfume Notes

    In perfume formulation, understanding notes is crucial. I find that perfume is generally composed of three layers: top, middle, and base notes.

    • Top notes: Here, I primarily use sweet orange and lemon. They provide an immediate burst of freshness and are the first scents perceived.
    • Middle notes: Bergamot sits in this layer, offering a bridge between the top and base notes, creating harmony in the fragrance.
    • Base notes: Vanilla holds this category, giving depth and longevity to the fragrance, ensuring that it lingers pleasantly on the skin.

    Recognizing these layers helps me balance my blend effectively.

    Mixing and Safety Tips

    When I mix my ingredients, I take care to follow safe practices. Here’s my process:

    1. Mix the essential oils first: I combine the essential oils in a small glass container.
    2. Add the carrier oil: I then incorporate the carrier oil, ensuring a smooth blend.
    3. Storage: I recommend transferring the mixed perfume to a dark glass bottle, which protects it from light and extends its shelf life.

    For safety, I perform a patch test on a small area of skin to check for any adverse reactions. It’s essential to avoid direct sunlight on the applied area, as some citrus oils can increase photosensitivity. Keeping these tips in mind ensures a pleasant and safe experience while crafting my perfume.

    Storing and Using Your Perfume

    Properly storing and applying your homemade sweet vanilla citrus perfume ensures that you enjoy its delightful scent for as long as possible. The right container will help maintain its integrity, while effective application techniques will enhance the fragrance’s longevity on your skin.

    Choosing the Right Container

    I recommend using dark glass bottles to store homemade perfume. Dark colors help protect essential oils from light, which can degrade their quality over time. A 10 ml or 30 ml spray bottle is ideal for easy application.

    Make sure the bottle has a tight-sealing cap to prevent air exposure. Exposure to air can affect the fragrance’s character. I often label my bottles with the ingredients and date to keep track of freshness.

    For convenience, consider using rollerball applicators. They allow for precise application on pulse points, optimizing the scent’s impact.

    Application Techniques for Lasting Scent

    To maximize the fragrance of my vanilla citrus perfume, I follow specific application techniques. I apply the perfume to pulse points, such as my wrists, behind my ears, and at the base of my throat. These areas produce warmth, which enhances the scent.

    After applying, I typically avoid rubbing my wrists together. This can break down the fragrance molecules, diminishing the scent. Instead, I let it dry naturally to maintain its integrity.

    To refresh the scent throughout the day, I carry a small 10 ml bottle in my bag. Just a quick spritz on pulse points can revive the fragrance without overwhelming it.

    10 Best Diy Homemade Vanilla Perfume Recipes Using Essential Oils

    We are on YouTube
    How to Make Your Skin GLOW with 3 Ingredients

✨ DIY Carrot Glow Cream Recipe
This recipe is designed to infuse your skin with the antioxidant power of carrots (beta-carotene) using just three core ingredients, as seen in your video.

🥕 Ingredients
Fresh Carrots (Grated)
Coconut Oil (For the oil infusion)
Aloe Vera Gel (For the cream base)

👩‍🍳 Step-by-Step Instructions
Roast the Carrots (Maximize Potency): Gently roast or dry the grated fresh carrots. This step helps to intensify and make the beta-carotene more accessible for extraction.

Infuse the Oil (Extract the Goodness): Place the roasted/dried carrots into a clean jar and cover them completely with coconut oil. Seal the jar and allow it to infuse, ideally overnight or longer, to extract the powerful antioxidants into the oil.

Strain the Oil (The Foundation): Carefully strain the oil mixture into a clean jar, separating the liquid (carrot oil) from the solids. This golden liquid is the foundation of your cream.

Create the Cream Base (Mix the Magic): Start with a dollop of pure aloe vera gel in a bowl.

Whisk and Transform: Slowly add the precise amount of your homemade carrot-infused oil to the aloe vera gel. Whisk the two ingredients together until they instantly transform into a smooth, vibrant orange cream.

🌟 Benefits
Vitamin A/Beta-Carotene: Carrots are rich in beta-carotene, a precursor to Vitamin A, which is known for promoting skin renewal and a healthy glow.

Moisture Lock: The combination of coconut oil and aloe vera helps to deeply hydrate and lock in moisture.

*Disclaimer: Always do a patch test before applying new products, especially DIY recipes, to your skin.*


Watch as we make a luxurious DIY carrot cream for a healthy, radiant complexion! This skincare diy uses natural ingredients to create a homemade skincare solution that's perfect for face care. We'll show you how to get glowing skin with this simple homemade recipes for a carrot body butter.
    I Made a Carrot Cream and My Skin Glows Now #skincare #natural #diy
    Watch how she transforms an empty Tree Hut Sugar Scrub jar into a viral DIY! 🤯 She didn't throw out her old jar—she refilled it from scratch with a homemade body scrub that looks even better than the original.

This DIY Tree Hut Scrub dupe is perfect for anyone looking for a skincare hack to save money and customize their exfoliation.

Ingredients used in the video:

Sugar
Ground Coffee
Body Wash (for a creamy base!)
Honey
Coconut Oil

Have you ever tried making your own body scrub? Let us know your favorite DIY skincare recipes in the comments!

#TreeHut #BodyScrub #DIYSkincare #SkincareHacks #TreeHutDupe #HomemadeScrub #BeautyHacks #Exfoliation #SelfCare #SugarScrub #YouTubeShorts #DIYBeauty

Watch as she creates a luxurious "homemade sugar scrub" right from her kitchen, reusing an old container. This "diy body scrub" combines simple ingredients for a fraction of the cost of store-bought versions, making it an ideal "body scrub at home". With this easy "sugar scrub for body", you can achieve incredibly smooth skin. It's a fantastic "diy projects" that shows you "how to make your skin smooth" naturally.
    Homemade Body Scrub That Looks Even Better Than Tree Hut #skincare
    DIY Moong Dal & Aloe Vera Face Mask for INSTANT GLOW! ✨

You won't believe the secret ingredient for **glowing skin**—it's **LENTILS** (specifically moong dal)! 🤯 Watch this quick DIY to see how she transformed simple kitchen ingredients into a powerful **natural face mask** for instant brightness.

In this short, she blended fine moong dal (split yellow lentils) into a powder, mixed it with soothing aloe vera gel, and a splash of water to create a creamy, natural beauty paste. This is your new go-to homemade glow mask!

**How to Use for Best Results:**
* Apply the mask evenly to your face.
* Leave it on for just **20 minutes**.
* Rinse thoroughly with **cold water** to close pores and lock in the brightness.

This quick DIY skincare hack uses traditional Indian beauty secrets (Ayurveda-inspired) to give you soft, bright, and glowing skin without harsh chemicals. Perfect for those looking for natural skincare routines and affordable beauty tips.

What do you think of this amazing hack? Let me know in the comments if you’ve tried a lentil mask before! 👇
👉 Like this video if you love natural beauty tips!
🔔 Subscribe for more easy DIYs and skincare hacks!

#diybeauty #skincarehacks #naturalbeauty #glowingskin #indianbeauty #moongdal #facepack #homemadefacemask #skincaretips #selfcare
    I Tried a DIY Lentil Face Mask and WOW! #skincare
    The #1 Natural Face Mask For Glowing Skin! ❤️ DIY Anti-Aging Recipe

Want brighter, younger-looking skin without expensive serums? This viral DIY face mask uses a surprisingly powerful ingredient: banana peels!

Watch the full short to learn how to make this simple, all-natural anti-aging remedy that also brightens and adds a gorgeous glow to your skin.

The 7-Day Challenge: Apply this mask every day for one week to see amazing results. It's packed with vitamins and antioxidants to help reduce the appearance of fine lines, wrinkles, and dark spots.

DIY Banana Peel Face Mask Recipe
What You'll Need:

1 Banana peel
2 tablespoons rice
200 ml of water
1 tablespoon milk powder
1 tablespoon cornstarch
1 tablespoon lemon juice

Instructions & Storage:

Boil the banana peel and rice in water until soft.

Blend the mixture until smooth.

Stir in the milk powder, cornstarch, and lemon juice.

Store in an airtight container in the refrigerator for up to 7 days.

👍 If you loved this natural skincare hack, hit the LIKE button and SUBSCRIBE for more easy DIY beauty recipes!

#DIYfaceMask #BananaPeelMask #AntiAgingMask #GlowingSkinHack #NaturalSkincare #RiceMask #DIYBeauty #YouTubeShorts #SkincareRoutine #WrinkleTreatment
    The #1 Natural Face Mask for Glowing Skin! ❤️ DIY Anti-Aging Recipe #skincare
    How to Make DIY Korean Flaxseed Mask for Skin Whitening (Natural Botox Effect!) 

Get the viral **"Natural Botox"** effect at home with this simple **DIY Korean flaxseed mask** recipe! This homemade treatment is famous for making skin look tighter, brighter, and deeply hydrated.

This short video shows you exactly how to make the best flaxseed gel mask using a simple addition—rice flour—for a powerful skin whitening and glass skin effect.

### ✨ Why this Mask Works:
* **Flaxseed Gel:** Rich in Omega-3s and antioxidants, it provides incredible hydration and creates a visible, temporary lift/tightening effect as it dries.
* **Rice Flour:** A key ingredient in Korean and Japanese skincare, known for its gentle brightening and skin-softening properties.

### 📋 Full Recipe Ingredients:
* 1 Cup Water
* 3 Tablespoons Whole Flaxseeds (Linseeds)
* 1 Tablespoon Rice Flour (or Cornstarch)

### 🌿 Quick Instructions:
1.  Boil water, flaxseeds, and rice flour.
2.  Stir continuously until it forms a thick, gelatinous paste (consistency shown in video).
3.  Cool completely. Apply thickly to face.
4.  Rinse off after 20-30 minutes for glowing, firm skin!

**➡️ Did you try this DIY face mask? Drop a comment below!**
👍 **Like and Subscribe for more easy natural skincare recipes and beauty hacks!**

#skincare #DIYMask #FlaxseedMask #NaturalBotox #KoreanSkincare #KBeauty #SkinWhitening #SkinFirming #AntiAgingTips #HomemadeSkincare #GlassSkin #RiceMask
    How to Make DIY Korean Flaxseed Mask for Skin Whitening (Natural Botox Effect!) #skincare
    Ultimate Blackhead Removal Hack! DIY Gelatin & Coffee Peel-Off Mask ☕️

Watch this satisfying mask detox your skin and remove blackheads, dead skin, and dirt! Get super smooth and fresh skin with this simple home remedy.

**✨ How to Make It:**
1. Scoop 1 part Gelatin, 1 part Coffee grounds, and a splash of Hot Water into a bowl.
2. Mix well until the gelatin dissolves and you have a thick, smooth paste.
3. Apply to your nose/t-zone and let it completely dry (about 15-20 minutes).
4. Slowly peel off the mask and see the results!

**⚠️ Note:** Always do a small patch test first. Do not use if you have sensitive or broken skin.

#shorts #blackheads #blackheadremoval #skincare #diyskincare #peeloffmask #satisfying #coffeemask #homeremedy #beautyhacks #skinroutine
    Ultimate Blackhead Removal Hack! DIY Gelatin & Coffee Peel Off Mask #skincare
    Load More... Subscribe
    Share. Facebook Twitter Pinterest LinkedIn Tumblr Email
    Hershey

    Hi, I’m Hershey — a lifelong natural skincare enthusiast with a love for creating simple, homemade beauty solutions that actually work. Inspired by my grandmother’s herbal remedies and my own sensitive skin journey, I started DIY Beauty Corner to share effective, affordable skincare recipes made from ingredients you already have at home.

    Related Posts

    DIY Homemade Vanilla Spice Perfume: Create Your Signature Scent Effortlessly

    April 24, 2023

    Homemade Tropical Vanilla Perfume: Create a Coconut and Lime Scent for a Summer Vibe

    February 24, 2023

    DIY Homemade Vanilla Rose Perfume: Crafting Your Own Unique Fragrance

    February 20, 2023

    Hi, I'm Hershey. I'm a skin care and beauty blogger who's NOT a morning person. (Seriously, who is?) I love making DIY skin care remedies from natural ingredients, and sharing my recipes and tips that can be used at home. Whether you're looking for ways to save money on your beauty routine, or just want to know how to take better care of your skin, you'll find something useful on my blog. So why not stick around for a while?

    Grandmas Homemade Face Mask Recipe

    Continue Reading
    DIY Beauty Corner

    Popular This Month

    • Sugar & Honey Body Scrub
    • Organic Body Butter
    • Korean Glass Skin Rice Mask
    • Turmeric Glow Body Scrub
    • Rosemary Hair Growth Oil
    • Quick Coffee Sugar Scrub
    • Vanilla & Brown Sugar Scrub
    • Pink Whipped Sugar Scrub
    • Non-Greasy Body Butter
    • Lemon Sugar Scrub

    Browse by DIY Recipe Type

    Body Scrub Recipes
    Face Mask Recipes
    Body Butter Recipes
    Hair Growth Recipes
    Lip Balm Recipes
    Perfume Recipes
    ⚠️ Please note: I’m not a licensed dermatologist or medical professional. All recipes shared are based on personal experience and research. Always perform a patch test before trying new skincare, and consult a healthcare provider for specific concerns.
    Pinterest YouTube
    • About
    • Contact
    • Disclaimer
    • Privacy Policy
    • Terms and Conditions
    © 2025 DIYBeautyCorner.com.

    Type above and press Enter to search. Press Esc to cancel.