This post may contain affiliate links. As an Amazon Associate I earn from qualifying purchases.
Easy Homemade Shea Butter Lotion Recipe – Non Greasy & Nourishing
Making your own lotion at home is both rewarding and beneficial for your skin.
A homemade shea butter lotion is a non-greasy option that moisturizes and nourishes without leaving a heavy residue.
This simple recipe lets you create a luxurious lotion tailored to your preferences, using natural ingredients you trust.

Using shea butter as the base, this lotion combines lightweight oils and beeswax for a smooth, silky consistency.
Add essential oils for fragrance and extra skin benefits. Ideal for daily face and body use, this DIY lotion is an affordable way to upgrade your skincare routine.
Shea Butter Lotion Essentials
To make your shea butter lotion, focus on quality ingredients and the right balance for a lightweight, non-greasy formula.
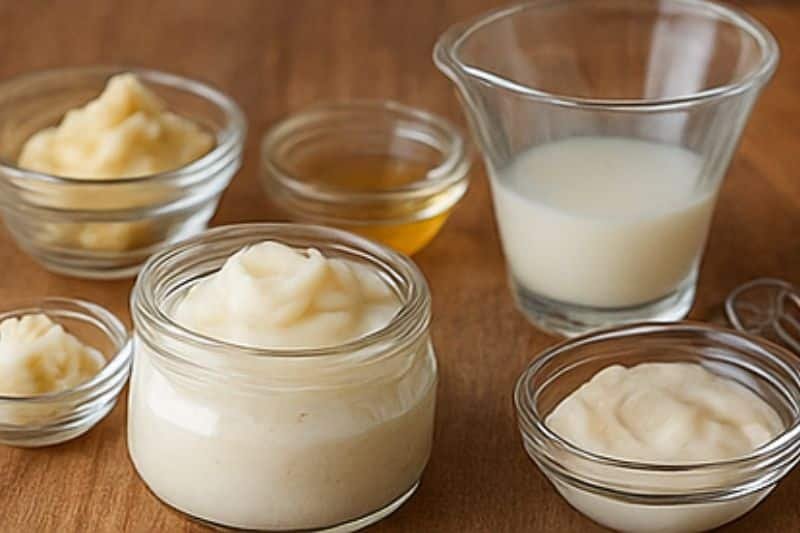
Key Ingredients
- Shea Butter (1 cup): Deeply moisturizing and nutrient-rich.
- Carrier Oil (½ cup): Choose almond, jojoba, or grapeseed for quick absorption.
- Beeswax (1 tbsp): Stabilizes and thickens the lotion.
- Vitamin E Oil (1 tsp): Natural preservative and skin protector.
- Essential Oils (optional): Add fragrance and extra skin benefits.
Tools You’ll Need
- Double boiler or heatproof bowl
- Hand mixer or whisk
- Glass jar with lid
- Measuring cups and spoons
Step-by-Step Instructions
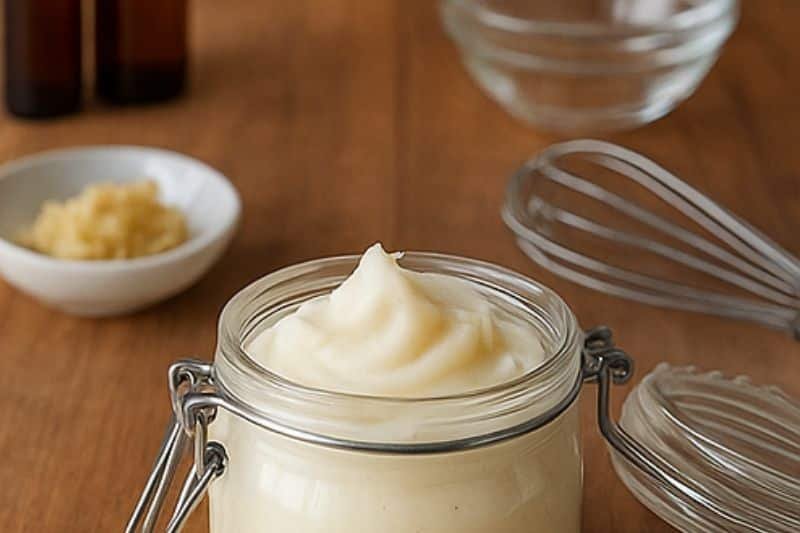
- Melt the Base: In a double boiler, combine shea butter, beeswax, and carrier oil. Stir until fully melted.
- Cool the Mixture: Remove from heat and let cool for 10–15 minutes.
- Blend in Additives: Add vitamin E and essential oils, then blend with a hand mixer until creamy.
- Whip Until Smooth: Continue whisking until the lotion reaches a light, whipped texture.
- Pour & Store: Transfer into a sterilized glass jar and seal.
Storage & Shelf Life
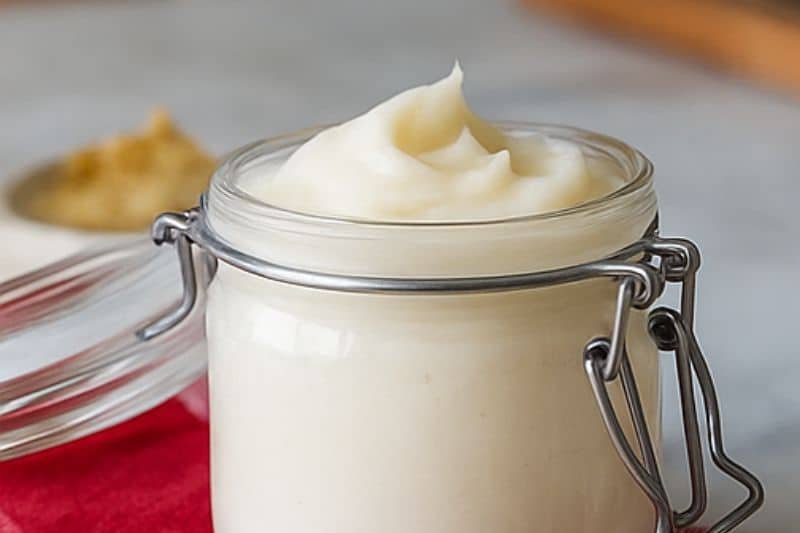
- Shelf Life: Up to 6 months in a cool, dry place.
- Tip: Always use clean hands or a spatula when scooping lotion to keep it fresh.