Liquid Castile soap is a versatile and natural soap that can be used for cleaning, personal hygiene, and more. It is made from a combination of oils, water, and lye, and can be customized with different scents and additives. In this article, we will explore the process of making liquid Castile soap at home.

One of the benefits of making your own liquid Castile soap is that you can control the ingredients and avoid harsh chemicals found in many commercial soaps. With just a few simple ingredients and tools, you can create a natural and gentle soap that is suitable for sensitive skin. Whether you are looking for a hand soap, body wash, or cleaning solution, liquid Castile soap is a great option to consider.
By following the steps outlined in this article and using the provided search results for additional guidance, you can create your own liquid Castile soap that is tailored to your specific needs and preferences. With a little bit of practice and experimentation, you can become an expert in making this natural and versatile soap.
Understanding Castile Soap

History of Castile Soap
Castile soap is a type of soap that has been around for centuries. It originated in the Castile region of Spain, where it was made from olive oil and soda ash. The soap was first introduced to Europe in the 11th century, and it quickly became popular due to its gentle nature and effectiveness in cleaning.
Benefits of Liquid Castile Soap
Liquid Castile soap is a versatile and gentle soap that can be used for a variety of purposes. It is made from natural ingredients and does not contain any harsh chemicals or additives. Some of the benefits of using liquid Castile soap include:
-
Gentle on skin: Liquid Castile soap is gentle on the skin and can be used by people with sensitive skin or allergies.
-
Environmentally friendly: Liquid Castile soap is biodegradable and does not harm the environment.
-
Versatile: Liquid Castile soap can be used for a variety of purposes, such as cleaning dishes, washing clothes, and even as a shampoo.
Key Ingredients
The key ingredients in liquid Castile soap are olive oil, water, and potassium hydroxide. Olive oil is the primary ingredient used to make Castile soap, and it provides the soap with its moisturizing properties. Potassium hydroxide is used to saponify the olive oil, which means it turns the oil into soap. Water is used to dissolve the potassium hydroxide and create the soap solution.
Other ingredients that may be added to liquid Castile soap include essential oils, which can provide additional benefits such as fragrance and antibacterial properties. It is important to note that when making liquid Castile soap at home, it is essential to use the correct measurements and follow the recipe carefully to ensure that the soap is safe and effective to use.
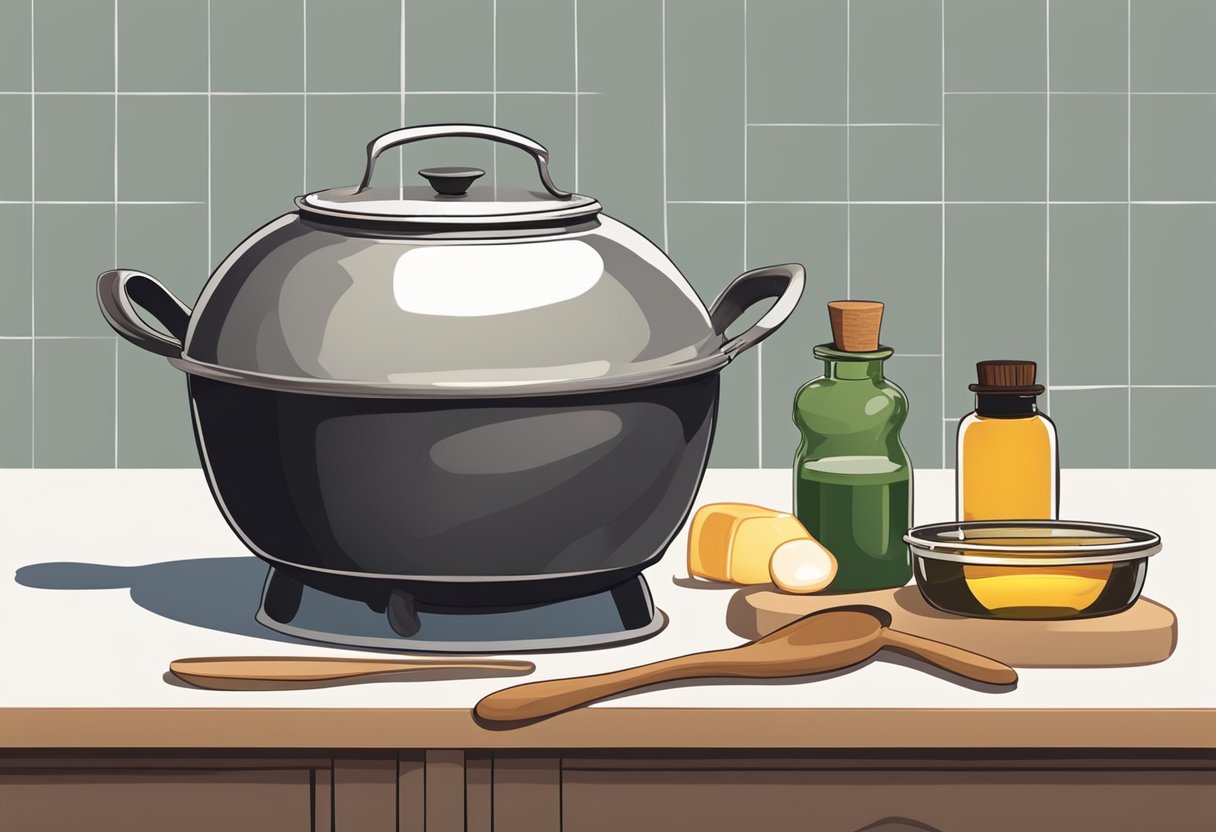
Gathering Materials

Equipment Needed
Before making liquid Castile soap, it is important to gather all the necessary equipment. Here is a list of the items needed:
- Slow cooker or crockpot
- Digital kitchen scale
- Measuring cups and spoons
- Rubber gloves
- Eye protection
- Face mask
- Stainless steel pot
- Heat-proof glass jug
- Plastic container
- Immersion blender
- Spoon or spatula
Safety Precautions
Making liquid Castile soap involves working with lye, which can be dangerous if not handled properly. Therefore, it is important to take the necessary safety precautions. Here are some tips to keep in mind:
- Always wear rubber gloves, eye protection, and a face mask when working with lye.
- Work in a well-ventilated area to avoid inhaling fumes.
- Keep vinegar or citric acid on hand to neutralize any lye spills or splashes.
- Keep children and pets away from the workspace.
- Do not use aluminum or non-stick cookware when making liquid Castile soap, as lye can react with these materials.
- Follow the recipe carefully and measure all ingredients precisely to avoid any mishaps.
By following these safety precautions and gathering all the necessary equipment, you can make liquid Castile soap safely and effectively.
The Soap Making Process
Preparing the Lye Solution
The first step in making liquid Castile soap is to prepare the lye solution. This involves carefully measuring out the correct amount of lye and mixing it with water. It is important to wear gloves and protective eyewear during this step, as lye can be dangerous if it comes into contact with skin or eyes. The lye solution should be mixed in a well-ventilated area to avoid inhaling any fumes.
Mixing Oils and Lye
Once the lye solution has been prepared, the next step is to mix it with oils. Olive oil is the traditional oil used in Castile soap, but other oils can also be used. The oils and lye solution should be mixed together slowly, stirring constantly. It is important to mix the oils and lye thoroughly to ensure that the soap will turn out correctly.
Blending to Trace
After the oils and lye have been mixed together, the mixture will begin to thicken and turn opaque. This is known as reaching “trace.” At this point, any fragrances or other additives can be added to the mixture. The mixture should be blended thoroughly to ensure that the additives are evenly distributed throughout the soap.
Cooking the Soap
The final step in making liquid Castile soap is to cook the soap. This involves heating the mixture over low heat, stirring constantly, until it reaches the desired consistency. The soap should be cooked until it is thick and gel-like in texture. Once the soap has reached the desired consistency, it can be poured into containers and allowed to cool and solidify. The soap can then be used for a variety of purposes, including as a cleaning solution, hand wash, body wash, shampoo, dish soap, or shower scrub.
Customizing Your Soap

Making your own liquid Castile soap is not only easy, but it also allows you to customize the soap to your liking. Here are some ways to personalize your soap:
Adding Fragrances
One way to customize your liquid Castile soap is to add fragrances. Essential oils are a great option for adding natural and pleasant scents to your soap. You can add a few drops of your favorite essential oil to the soap base after it has cooled down. Some popular essential oils for soap-making include lavender, peppermint, and eucalyptus.
Incorporating Colorants
Another way to customize your soap is by adding colorants. You can use natural colorants, such as beet juice or turmeric, to give your soap a unique hue. Alternatively, you can use cosmetic-grade liquid colorants, which are specifically designed for soap-making. It’s important to note that adding too much colorant can affect the texture and consistency of the soap.
Adjusting Thickness
Lastly, you can adjust the thickness of your liquid Castile soap by adding more or less water. If you prefer a thicker soap, you can add less water to the soap base. On the other hand, if you prefer a thinner soap, you can add more water. It’s important to note that adding too much water can affect the soap’s cleansing properties.
Overall, customizing your liquid Castile soap is a fun and easy way to create a soap that meets your personal preferences. By adding fragrances, colorants, and adjusting the thickness, you can create a soap that is unique to you.
Molding and Curing

Pouring into Molds
Once the soap mixture has reached trace, it’s time to pour it into molds. There are many options for molds, including silicone molds, wooden molds, and even recycled cardboard boxes lined with parchment paper. Whatever the mold, it’s important to prepare it beforehand by greasing it lightly with a non-stick spray or lining it with parchment paper.
When pouring the soap mixture into the mold, it’s important to do so slowly and carefully. This helps to prevent air bubbles from forming and ensures that the soap sets evenly. Once the mold is filled, tap it gently on a flat surface to release any remaining air bubbles.
Curing Process
After the soap has been poured into the molds, it’s time to let it cure. This process can take anywhere from a few days to a few weeks, depending on the recipe and the desired hardness of the soap. During the curing process, the soap will harden and become more mild, making it gentler on the skin.
To cure the soap, it should be left in a cool, dry place where it won’t be disturbed. It’s important to turn the soap over every few days to ensure that it cures evenly. Once the soap is fully cured, it can be removed from the mold and cut into bars.
Overall, the molding and curing process is an important step in making liquid Castile soap. By following these steps carefully, you can ensure that your soap sets evenly and cures properly, resulting in a high-quality, mild soap that’s perfect for a variety of uses.
Packaging and Storage

Labeling
Once the liquid Castile soap is ready, it is important to label the container with the date it was made and the ingredients used. This will help to keep track of the soap’s shelf life and ensure that it is being used before it goes bad. Additionally, if any essential oils or fragrances were added to the soap, make sure to include those on the label as well.
Shelf Life and Storage Tips
Liquid Castile soap typically has a shelf life of around 6-12 months, depending on the ingredients used and how it is stored. To extend the shelf life of the soap, it is recommended to store it in a cool, dry place away from direct sunlight. Exposure to heat and light can cause the soap to degrade more quickly.
If you are making a large batch of liquid Castile soap, consider dividing it into smaller containers for easier storage. Glass containers are a good option as they are non-reactive and won’t leach any harmful chemicals into the soap. Plastic containers can be used, but make sure they are made from a high-quality, food-grade plastic that won’t break down over time.
When using the soap, it is important to shake the container well before each use to ensure that the ingredients are evenly distributed. If the soap starts to separate or develop an off odor, it should be discarded and a new batch should be made. By following these simple packaging and storage tips, you can enjoy your homemade liquid Castile soap for months to come.
Troubleshooting Common Issues

Making liquid Castile soap can be a bit tricky, especially for beginners. Here are some common issues that may arise and how to troubleshoot them.
Problem: Separation
If the soap mixture separates into layers, it may be due to insufficient mixing or incorrect ratios of ingredients. To fix this, try stirring the mixture vigorously for a few minutes. If the separation persists, try adding a small amount of salt to the mixture and stirring again.
Problem: Cloudiness
If the soap appears cloudy, it may be due to impurities in the ingredients or incorrect ratios of ingredients. To fix this, try filtering the soap through a cheesecloth or strainer. If the cloudiness persists, try reducing the amount of water in the recipe.
Problem: Low Lather
If the soap produces low lather, it may be due to incorrect ratios of ingredients or insufficient mixing. To fix this, try increasing the amount of coconut oil in the recipe or stirring the mixture more vigorously. Adding a small amount of sugar or honey may also help to increase lather.
Problem: Strong Odor
If the soap has a strong odor, it may be due to impurities in the ingredients or incorrect ratios of ingredients. To fix this, try reducing the amount of essential oils in the recipe or using a different brand of ingredients. Adding a small amount of baking soda may also help to neutralize the odor.
By following these troubleshooting tips, you can ensure that your liquid Castile soap turns out perfectly every time.
Frequently Asked Questions

What is the traditional process for making liquid Castile soap?
The traditional process for making Castile soap involves using olive oil as the main ingredient and a lye solution to saponify the oil. The mixture is then cured for several weeks to allow the soap to harden and become milder. Liquid Castile soap is made using a similar process, but with the addition of water to create a liquid consistency.
Can you create liquid Castile soap using olive oil as the main ingredient?
Yes, olive oil is the traditional and most commonly used oil for making Castile soap, including liquid Castile soap. However, other oils can also be used, such as coconut oil, to create different variations of the soap.
What steps are involved in turning a bar of Castile soap into a liquid form?
To turn a bar of Castile soap into a liquid form, the soap is grated or shredded and mixed with water. The mixture is then heated to dissolve the soap and create a liquid consistency. Essential oils or other additives can be added to create different scents or properties.
Is it possible to make Castile soap without using lye, and if so, how?
No, it is not possible to make Castile soap without using lye. Lye is necessary to saponify the oils and create soap. However, there are ways to make the soapmaking process safer, such as using a lye calculator to ensure the correct amount of lye is used and wearing protective gear when handling lye.
How can potassium hydroxide be used to make liquid Castile soap?
Potassium hydroxide is an alternative to sodium hydroxide (lye) that is used in the soapmaking process to create a liquid soap. It is used in combination with oils, such as olive oil, and water to create a liquid Castile soap. The process involves mixing the potassium hydroxide and water, then adding the oil and heating the mixture until it reaches the desired consistency.
What is a good liquid Castile soap recipe that includes coconut oil?
A good liquid Castile soap recipe that includes coconut oil involves using a combination of olive oil, coconut oil, and potassium hydroxide. The recipe can be customized with different essential oils or other additives to create different scents or properties.