Close Menu
Homemade Skincare Recipes and Beauty Tips
    Pinterest
    Trending
    • DIY Rosemary Water Hair Rinse
    • Brown Sugar & Coconut Oil Scrub
    • Oatmeal & Yogurt Soothing Scrub
    • Turmeric & Rice Flour Scrub for Dark Spots
    • Coffee & Sugar Scrub Recipe at Home
    • DIY Lemon & Honey Body Scrub for Bright Skin
    • How to Do a Skincare Patch Test
    • How to Make Rice Water Rinse for Hair Growth
    • About Us
    • Contact Us
    • Disclaimer
    • Privacy Policy
    • Terms
    Homemade Skincare Recipes and Beauty Tips
    • Home
    • DIY Body Scrub Recipes
    • DIY Face Mask Recipes
    • DIY Body Butter Recipes
    • DIY Hair Growth Recipes
    • DIY Lip Balm Recipes
    Homemade Skincare Recipes and Beauty Tips
    Home»DIY Homemade Honey Skincare Recipes»DIY Homemade Honey And Almond Oil Cuticle Softener for Healthier Nails
    DIY Homemade Honey Skincare Recipes

    DIY Homemade Honey And Almond Oil Cuticle Softener for Healthier Nails

    HersheyBy HersheyMarch 6, 2022No Comments5 Mins Read
    Facebook Twitter Pinterest LinkedIn Tumblr Email
    Share
    Facebook Twitter LinkedIn Pinterest Email
    DIY Homemade Honey And Almond Oil Cuticle Softener for Healthier Nails

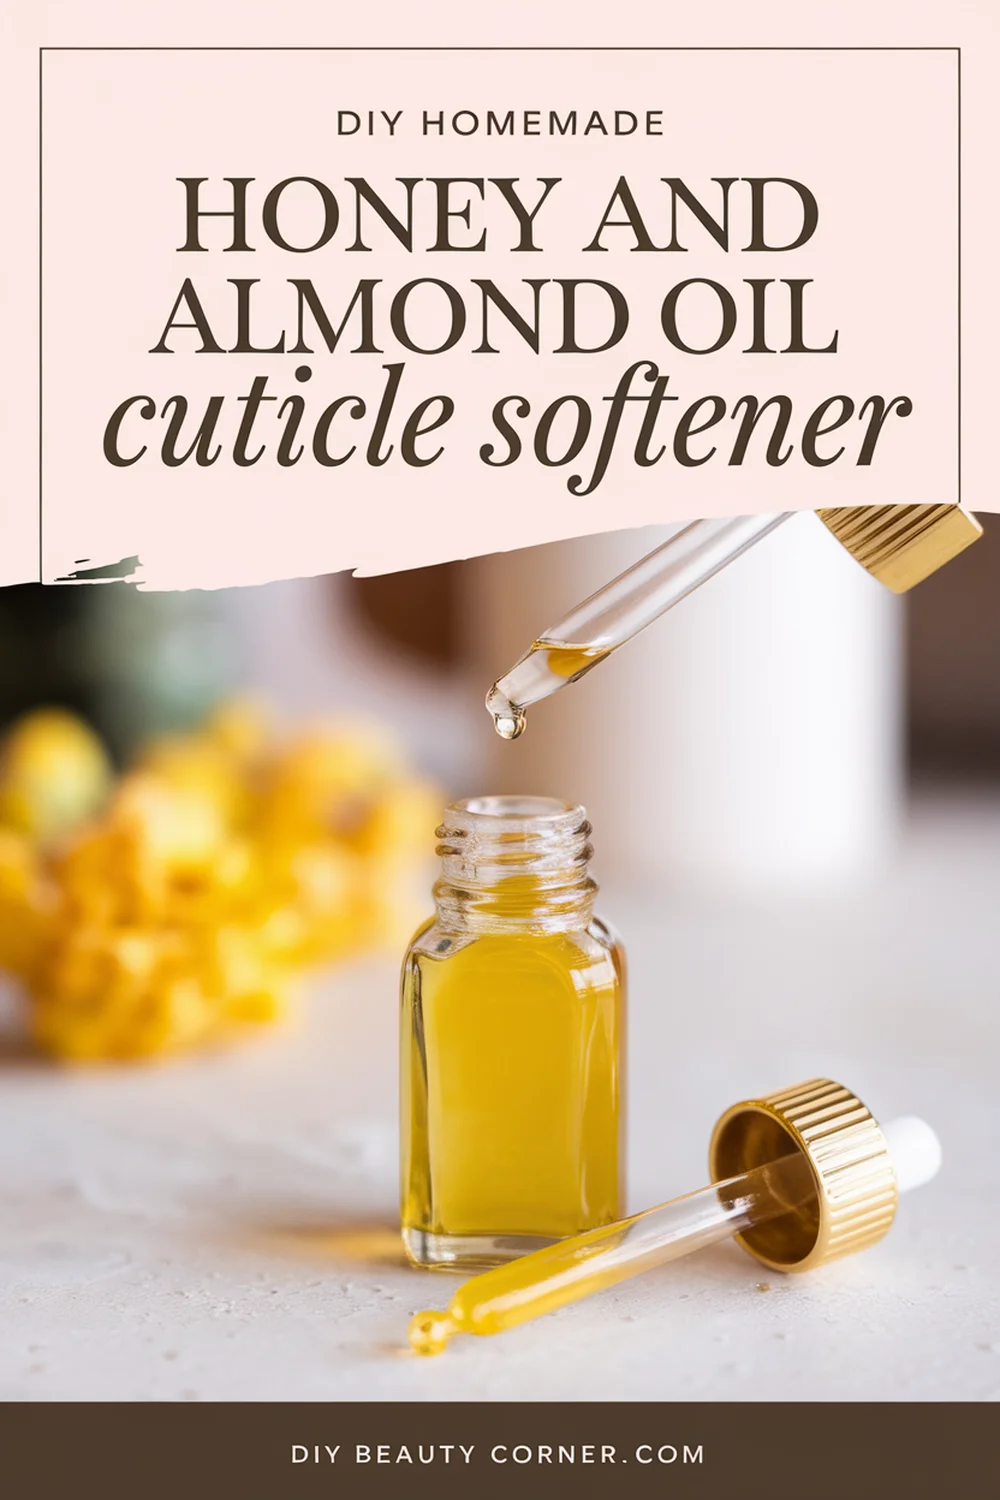
    Taking care of my nails and cuticles is crucial for maintaining their health and appearance. One of my favorite DIY solutions is a homemade cuticle softener made from honey and almond oil. This easy recipe not only nourishes dry cuticles but also helps promote healthy nail growth.

    Incorporating natural ingredients like honey and almond oil offers multiple benefits. Honey acts as a natural humectant, drawing moisture to the skin, while almond oil provides essential vitamins that soften and moisturize. Together, they create a simple yet effective blend that elevates my self-care routine and keeps my nails looking their best.

    In this blog post, I will share my favorite recipe for this DIY cuticle softener, along with tips for application and storage. With just a few ingredients, you’ll be on your way to healthier cuticles in no time.

    DIY Honey and Almond Oil Cuticle Softener Benefits

    Using a blend of honey and almond oil for cuticle care offers several distinct advantages. This combination not only nourishes the nails but also promotes healthier growth and provides moisture. I find these benefits crucial for maintaining nail health and aesthetics.

    Natural Nourishment for Nails

    Honey is a natural humectant, meaning it draws moisture from the environment into the skin. This property helps to keep my cuticles well-hydrated. Additionally, honey’s rich nutrient profile includes vitamins and minerals that nourish the nails, helping to strengthen them.

    Almond oil complements honey by providing essential fatty acids that support nail health. The combination of these two ingredients creates a powerful treatment for nails that tend to be dry or brittle. When I use this blend, I notice my nails feel softer and more resilient.

    Enhancing Nail Health and Growth

    Incorporating honey and almond oil into my cuticle care routine significantly boosts my nail health. Almond oil contains vitamin E, which is known for its role in promoting healthy nail growth. This vitamin works by reducing oxidative stress, allowing nails to grow stronger and faster.

    Moreover, honey’s natural antioxidants combat free radicals that can damage nails. By promoting healthy cell turnover, this mixture helps to ensure that my nails not only grow well but also look vibrant and healthy. Regular application can lead to noticeable improvements in the strength and appearance of my nails.

    Moisturizing Properties of Almond Oil

    Almond oil is renowned for its moisturizing benefits. When I apply it to my cuticles, the oil penetrates deeply, providing lasting hydration. Unlike many products that can leave a greasy residue, almond oil is lightweight and absorbs quickly, making it ideal for daily use.

    The oil helps to prevent dryness and cracking of the cuticles, which can be both unsightly and painful. Its rich texture ensures that my cuticles remain soft and supple throughout the day. I find that using this oil consistently leads to visibly healthier cuticles.

    Antibacterial Benefits of Honey

    Honey’s natural antibacterial properties are an often-overlooked benefit. When I apply honey to my cuticles, it helps protect against infections that can arise from minor cuts or abrasions. This is particularly beneficial if I frequently push back my cuticles or have exposed skin.

    Additionally, honey contains enzymes that can promote healing, making it an excellent choice for maintaining cuticle health. This antibacterial action ensures that my nails not only look good but also remain healthy and free from infections. By using this natural remedy, I feel confident that I’m taking proactive steps to care for my nails.

    Creating Your Cuticle Softener

    I enjoy crafting my own cuticle softener at home, combining honey and almond oil for a nourishing treatment. This process is simple and rewarding, allowing for personalized care tailored to my nails and cuticles.

    Ingredients and Tools Required

    To create my cuticle softener, I gather the necessary ingredients first. The primary components are:

    • 1 tablespoon of honey: This serves as a natural humectant, helping to lock in moisture.
    • 1 tablespoon of almond oil: Known for its hydrating properties, almond oil promotes softness and suppleness.

    Additionally, I ensure I have the following tools:

    • A small mixing bowl
    • A spoon for stirring
    • A small container for storing the final product

    These items make the mixing and storage process straightforward.

    Step-by-Step Mixing Process

    I start by combining the honey and almond oil in my mixing bowl. It’s important to follow these steps closely:

    1. Measure 1 tablespoon of honey and add it to the bowl.
    2. Measure 1 tablespoon of almond oil and pour it in.
    3. Using a spoon, I stir the mixture thoroughly. I aim for a smooth, even consistency without any lumps.

    If I prefer a slightly warmer mixture, I can microwave it for about 10 seconds. However, I ensure not to overheat it, as excessive heat can alter the beneficial properties of the ingredients.

    Application Techniques

    After mixing, I apply the cuticle softener correctly for the best results. Here’s how I typically do it:

    • I take a small amount of the mixture on my fingertip or use a cotton swab.
    • Gently, I massage it into my cuticles and the surrounding skin, ensuring full coverage.
    • I allow the softener to sit for about 10-15 minutes before washing it off. This enables the honey and oil to absorb effectively.

    For optimal results, I do this treatment 2-3 times a week. Consistency is key to maintaining healthy cuticles.

    Storage and Shelf Life

    Once my cuticle softener is ready, I store it in a clean, airtight container to keep it fresh. I typically use a small jar or a squeeze bottle.

    The softener can last up to 2-3 weeks if kept in a cool, dry place. I avoid exposure to direct sunlight or moisture, as these factors can degrade its quality over time. Keeping it refrigerated can extend its shelf life, but I ensure to allow it to reach room temperature before use for easy application.

    45 Best Diy Homemade Skincare Recipes With Honey

    We are on YouTube
    🚨 STOP! Just because it’s a traditional/viral hack doesn't mean it's safe. Mixing Lemon + Baking Soda for razor bumps is an alkaline/acid chemical reaction that can cause a severe burn and permanent scarring. We need to stop using kitchen ingredients on sensitive skin! Safe alternatives inside.

#razorbumps #razorburn #skincarefail #grandmahacks #diyskincare #chemicalburn #sensitiveskin #skincarescience #beautytok
    The Razor Bump Hack My Grandma Taught Me (🛑STOP Doing This!) #skincare
    Stop wasting money on travel size perfume! This easy DIY solid perfume hack uses Vaseline and your favorite scent to create a non-spill, long-lasting balm. 👉 FULL RECIPE IN THE PINNED COMMENT!

#shorts #perfumehack #solidperfume #DIYbeauty #Vaselinehack #longlastingperfume #cologne

Discover a simple yet effective perfume hack to make your favorite fragrance last all day! This video shows you how to combine perfume with vaseline to create a DIY solid perfume, perfect for on-the-go application. Learn how to make perfume that stays with you, offering long lasting perfumes and fragrance hacks for a lasting scent.
    🤯 How to Make Perfume Last 10x Longer #beautyhacks #perfumetrick #lifehack
    DIY TURMERIC MASK for GLASS SKIN (Actually Works!) 

Achieve the viral Glass Skin look at home with this simple, cost-effective DIY face mask! This natural recipe uses three potent ingredients to give your face an incredible glow, hydration, and softness.

✨ Why this mask works:

Turmeric (Cúrcuma): Known for its brightening properties to target dullness and even skin tone.

Cornstarch (Maicena): Helps soothe the skin and create a smooth mask texture.

Honey (Miel): A powerful natural humectant that draws in and locks moisture into the skin, keeping it supple.

Ingredients Needed:

2 Tbsp Cornstarch
2 Tbsp Turmeric Powder
1 Cup Honey (approx.)

Directions:

Mix the cornstarch and turmeric powder well.

Add honey and stir until you achieve a thick, smooth, golden paste.

Apply to a clean face and leave on for 15-20 minutes before rinsing.

#Shorts #DIYFaceMask #GlassSkin #TurmericMask #SkincareHacks #NaturalSkincare #HomemadeRemedies #BeautyHacks #Cúrcuma #Maicena #HoneyMask

Want that viral glass skin glow naturally? This easy DIY face mask combines cornstarch, turmeric, and honey to create a powerful skincare solution. This homemade face mask hydrates, softens, and gives you a vibrant, healthy glowing skin, perfect for your routine.
    🥰 DIY TURMERIC MASK for GLASS SKIN #skincare
    🤯 DIY Almond Mask for Glass Skin (It Actually Works!)

You won't believe how easy this is! 🧼 Tired of expensive serums? This simple, homemade skincare hack uses just two key ingredients—almonds and raw milk—to reveal an instant, visible glow.

The Secret: Soaked and peeled almonds are a gentle, natural source of Vitamin E and healthy fats, while raw milk provides lactic acid for mild, non-irritating exfoliation.

➡️ How to Get the Glow:

Soak 2 almonds overnight (or for a few hours).

Peel the skin off.

Grind the peeled almonds with a splash of raw milk until you get a thick, granular paste. (You can use a mortar and pestle or a small blender!)

Apply the paste to your face/wrist, rub gently for 30 seconds, and wipe off.

Watch the magic happen! ✨ Use this DIY face scrub 1-2 times a week for a brighter complexion, reduced tan, and that sought-after glass skin texture.

👍 Like & Save this video if you love natural beauty secrets! 🔔 Subscribe for more easy homemade skincare recipes!

#GlassSkin #DIYBeauty #AlmondMask #SkincareHacks #NaturalSkincare #HomemadeFaceMask #InstantBrightening #GlowUp #RawMilkBenefits #EasySkincare #Exfoliation #BeautyTips #IndianSkincare

Watch as she creates a luxurious "almond face pack" using ancient technology, transforming simple ingredients into a powerful "skincare routine" for instant "glowing skin". This natural skincare remedies video shows you "how to make" a traditional beauty paste, perfect for a soothing moment of self care. ✨
    🤯 DIY Almond Mask for Glass Skin (It Actually Works) #skincare
    How to Make Your Skin GLOW with 3 Ingredients

✨ DIY Carrot Glow Cream Recipe
This recipe is designed to infuse your skin with the antioxidant power of carrots (beta-carotene) using just three core ingredients, as seen in your video.

🥕 Ingredients
Fresh Carrots (Grated)
Coconut Oil (For the oil infusion)
Aloe Vera Gel (For the cream base)

👩‍🍳 Step-by-Step Instructions
Roast the Carrots (Maximize Potency): Gently roast or dry the grated fresh carrots. This step helps to intensify and make the beta-carotene more accessible for extraction.

Infuse the Oil (Extract the Goodness): Place the roasted/dried carrots into a clean jar and cover them completely with coconut oil. Seal the jar and allow it to infuse, ideally overnight or longer, to extract the powerful antioxidants into the oil.

Strain the Oil (The Foundation): Carefully strain the oil mixture into a clean jar, separating the liquid (carrot oil) from the solids. This golden liquid is the foundation of your cream.

Create the Cream Base (Mix the Magic): Start with a dollop of pure aloe vera gel in a bowl.

Whisk and Transform: Slowly add the precise amount of your homemade carrot-infused oil to the aloe vera gel. Whisk the two ingredients together until they instantly transform into a smooth, vibrant orange cream.

🌟 Benefits
Vitamin A/Beta-Carotene: Carrots are rich in beta-carotene, a precursor to Vitamin A, which is known for promoting skin renewal and a healthy glow.

Moisture Lock: The combination of coconut oil and aloe vera helps to deeply hydrate and lock in moisture.

*Disclaimer: Always do a patch test before applying new products, especially DIY recipes, to your skin.*


Watch as we make a luxurious DIY carrot cream for a healthy, radiant complexion! This skincare diy uses natural ingredients to create a homemade skincare solution that's perfect for face care. We'll show you how to get glowing skin with this simple homemade recipes for a carrot body butter.
    I Made a Carrot Cream and My Skin Glows Now #skincare #natural #diy
    Watch how she transforms an empty Tree Hut Sugar Scrub jar into a viral DIY! 🤯 She didn't throw out her old jar—she refilled it from scratch with a homemade body scrub that looks even better than the original.

This DIY Tree Hut Scrub dupe is perfect for anyone looking for a skincare hack to save money and customize their exfoliation.

Ingredients used in the video:

Sugar
Ground Coffee
Body Wash (for a creamy base!)
Honey
Coconut Oil

Have you ever tried making your own body scrub? Let us know your favorite DIY skincare recipes in the comments!

#TreeHut #BodyScrub #DIYSkincare #SkincareHacks #TreeHutDupe #HomemadeScrub #BeautyHacks #Exfoliation #SelfCare #SugarScrub #YouTubeShorts #DIYBeauty

Watch as she creates a luxurious "homemade sugar scrub" right from her kitchen, reusing an old container. This "diy body scrub" combines simple ingredients for a fraction of the cost of store-bought versions, making it an ideal "body scrub at home". With this easy "sugar scrub for body", you can achieve incredibly smooth skin. It's a fantastic "diy projects" that shows you "how to make your skin smooth" naturally.
    Homemade Body Scrub That Looks Even Better Than Tree Hut #skincare
    Load More... Subscribe
    Share. Facebook Twitter Pinterest LinkedIn Tumblr Email
    Hershey

    Hi, I’m Hershey — a lifelong natural skincare enthusiast with a love for creating simple, homemade beauty solutions that actually work. Inspired by my grandmother’s herbal remedies and my own sensitive skin journey, I started DIY Beauty Corner to share effective, affordable skincare recipes made from ingredients you already have at home.

    Related Posts

    DIY Hydrating Hair Mask – Honey and Avocado Recipe

    April 24, 2025

    Homemade Natural Hair Shine Spray – Honey And Argan Oil Recipe for Luscious Locks

    September 9, 2022

    DIY Homemade Natural Detox Face Mask – Honey and Spirulina Recipe for Radiant Skin

    August 4, 2022

    Hi, I'm Hershey. I'm a skin care and beauty blogger who's NOT a morning person. (Seriously, who is?) I love making DIY skin care remedies from natural ingredients, and sharing my recipes and tips that can be used at home. Whether you're looking for ways to save money on your beauty routine, or just want to know how to take better care of your skin, you'll find something useful on my blog. So why not stick around for a while?

    Grandmas Homemade Face Mask Recipe

    Continue Reading
    DIY Beauty Corner

    Popular This Month

    • Sugar & Honey Body Scrub
    • Organic Body Butter
    • Korean Glass Skin Rice Mask
    • Turmeric Glow Body Scrub
    • Rosemary Hair Growth Oil
    • Quick Coffee Sugar Scrub
    • Vanilla & Brown Sugar Scrub
    • Pink Whipped Sugar Scrub
    • Non-Greasy Body Butter
    • Lemon Sugar Scrub

    Browse by DIY Recipe Type

    Body Scrub Recipes
    Face Mask Recipes
    Body Butter Recipes
    Hair Growth Recipes
    Lip Balm Recipes
    Perfume Recipes
    ⚠️ Please note: I’m not a licensed dermatologist or medical professional. All recipes shared are based on personal experience and research. Always perform a patch test before trying new skincare, and consult a healthcare provider for specific concerns.
    Pinterest YouTube
    • About
    • Contact
    • Disclaimer
    • Privacy Policy
    • Terms and Conditions
    © 2025 DIYBeautyCorner.com.

    Type above and press Enter to search. Press Esc to cancel.