Close Menu
Homemade Skincare Recipes and Beauty Tips
    Pinterest
    Trending
    • DIY Rosemary Water Hair Rinse
    • Brown Sugar & Coconut Oil Scrub
    • Oatmeal & Yogurt Soothing Scrub
    • Turmeric & Rice Flour Scrub for Dark Spots
    • Coffee & Sugar Scrub Recipe at Home
    • DIY Lemon & Honey Body Scrub for Bright Skin
    • How to Do a Skincare Patch Test
    • How to Make Rice Water Rinse for Hair Growth
    • About Us
    • Contact Us
    • Disclaimer
    • Privacy Policy
    • Terms
    Homemade Skincare Recipes and Beauty Tips
    • Home
    • DIY Body Scrub Recipes
    • DIY Face Mask Recipes
    • DIY Body Butter Recipes
    • DIY Hair Growth Recipes
    • DIY Lip Balm Recipes
    Homemade Skincare Recipes and Beauty Tips
    Home»Homemade Skin Care Recipes»DIY Hydrating Green Tea Face Mask: Simple Recipe with Just Three Ingredients
    Homemade Skin Care Recipes

    DIY Hydrating Green Tea Face Mask: Simple Recipe with Just Three Ingredients

    HersheyBy HersheyNovember 12, 2022No Comments6 Mins Read
    Facebook Twitter Pinterest LinkedIn Tumblr Email
    Share
    Facebook Twitter LinkedIn Pinterest Email
    DIY Hydrating Green Tea Face Mask

    Creating a refreshing and hydrating face mask at home can be simple and effective. With just three ingredients, you can whip up a soothing treatment that nourishes your skin and enhances your natural glow. This DIY hydrating green tea face mask utilizes the benefits of green tea, raw honey, and aloe vera gel to rejuvenate and moisturize your complexion.

    Green tea is renowned for its antioxidant properties, making it a fantastic addition to your skincare routine. By combining it with raw honey and aloe vera gel, you create a mask that not only hydrates but also calms and revitalizes your skin. This mask is perfect for anyone looking to pamper themselves while using all-natural ingredients.

    Incorporating this straightforward recipe into your self-care routine will leave your skin feeling soft, bright, and refreshed. Whether you need to unwind after a long day or prepare for a special occasion, this face mask will help you achieve the healthy, glowing skin you desire.

    Ingredients and Benefits

    A bowl filled with green tea leaves, honey, and yogurt, surrounded by fresh green tea leaves and a jar of honey

    This hydrating green tea face mask offers a combination of powerful ingredients that work together to nourish and rejuvenate your skin. Each component has distinct benefits, providing hydration, antioxidant protection, and brightening effects.

    Green Tea: Antioxidant Powerhouse

    Green tea is rich in antioxidants, particularly catechins, which help combat skin damage caused by free radicals. These antioxidants protect your skin from environmental stressors, contributing to a healthier complexion.

    When applied topically, green tea may reduce inflammation, soothe irritation, and minimize redness. Its antibacterial properties can also help prevent acne, making it suitable for various skin types.

    To use green tea in your mask, steep tea leaves or use powdered matcha. Both options deliver similar skin benefits, but matcha has a more concentrated antioxidant content, enhancing its effectiveness.

    Honey: Natural Humectant

    Honey is renowned for its humectant properties, meaning it attracts moisture and helps maintain skin hydration. It acts as a natural moisturizer, leaving your skin feeling soft and supple.

    In addition to its hydrating effects, honey possesses antimicrobial qualities. This helps keep your skin free from bacteria, reducing the risk of breakouts.

    Raw honey is the most beneficial choice for your mask, as it retains more nutrients than processed honey. You can mix it with other ingredients for added nourishment, enhancing your mask’s overall effectiveness.

    Lemon Juice: Brightening Agent

    Lemon juice is known for its natural exfoliating and brightening effects. It contains citric acid, which helps remove dead skin cells and promotes cell turnover, resulting in a brighter complexion.

    Moreover, lemon juice can help even out skin tone, reducing the appearance of dark spots and hyperpigmentation over time. Its astringent properties can also tighten pores, contributing to a smoother skin texture.

    When using lemon juice, be cautious if you have sensitive skin, as it can cause irritation. Always dilute it with other ingredients, such as honey or green tea, to minimize any potential side effects while maximizing its benefits.

    Step-by-Step Guide

    A table with a bowl of green tea leaves, honey, and yogurt. A spoon and mixing bowl are nearby. Sunlight streams through a window onto the ingredients

    Creating a DIY hydrating green tea face mask is simple and requires just three main ingredients. Follow the steps below to prepare, mix, apply, and remove your mask effectively.

    Preparing the Green Tea

    1. Choose Your Tea: Opt for high-quality green tea, either in bag form or loose leaf. If using loose leaf, measure approximately one teaspoon.

    2. Brew the Tea: Boil a cup of water and pour it over the green tea. Let it steep for about 3-5 minutes. This process extracts the beneficial antioxidants from the tea.

    3. Cool the Tea: After steeping, remove the tea leaves or bag and allow the tea to cool to room temperature. Cooling is essential to avoid burning your skin during application.

    Mixing the Ingredients

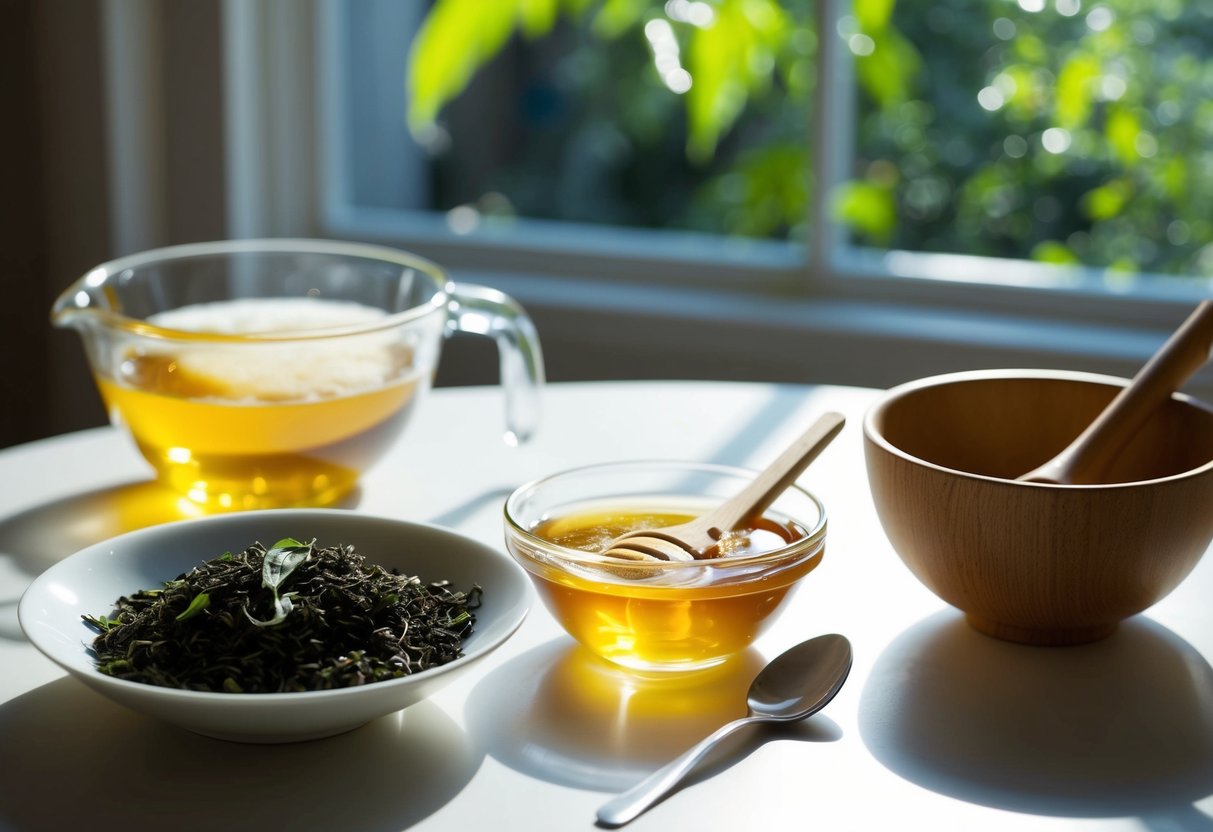
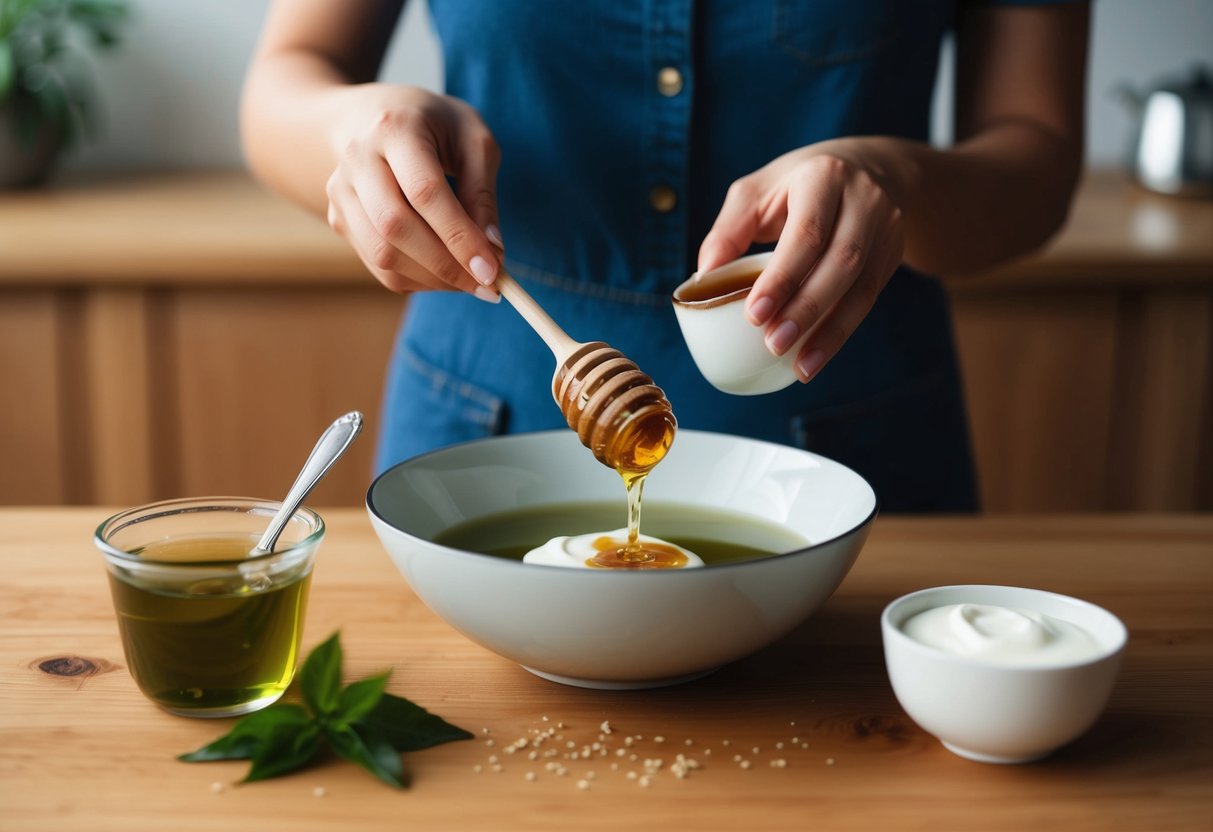
    1. Gather Your Ingredients: You will need the cooled green tea, 1 teaspoon of raw honey, and 2 teaspoons of aloe vera gel. Measure each component carefully.

    2. Combine in a Bowl: In a small mixing bowl, add the honey first. This acts as a natural humectant, drawing moisture to the skin.

    3. Add Aloe Vera: Next, mix in the aloe vera gel. It hydrates and soothes the skin, reducing any irritation.

    4. Incorporate Green Tea: Finally, pour in the cooled green tea. Stir the mixture until you achieve a smooth, consistent paste. The mask should not be too thick or runny.

    Application and Duration

    1. Prep Your Face: Ensure your face is clean and dry before applying the mask. You can cleanse with a gentle facial cleanser for the best results.

    2. Apply Evenly: Using clean fingers or a brush, apply the mask evenly across your face. Avoid the areas around your eyes and mouth, which are more sensitive.

    3. Duration: Leave the mask on for 20-30 minutes. This allows the ingredients to penetrate your skin effectively, providing maximum hydration.

    4. Stay Relaxed: While the mask works, take this opportunity to relax. You can lie back, listen to music, or meditate.

    Removal and Aftercare

    1. Begin Removal: After the mask has set, rinse it off with warm water. Use gentle circular motions to help remove all residues.

    2. Pat Dry: After rinsing, towel-dry your face by gently patting it. Avoid rubbing, as this can irritate the skin.

    3. Moisturize: Follow up with a suitable moisturizer to lock in hydration. This step is crucial to maintain skin softness.

    4. Frequency of Use: For optimal results, repeat this mask once or twice a week. Consistency helps maintain your skin’s hydration levels.

    Frequently Asked Questions

    A woman mixing green tea, honey, and yogurt in a bowl

    Using a DIY hydrating green tea face mask provides numerous benefits, application tips, and variations for overnight use. This section addresses common inquiries to ensure you get the most from your skincare routine.

    What are the benefits of using a green tea and honey face mask?

    A green tea and honey face mask offers various skin benefits. Green tea is rich in antioxidants, helping to protect your skin from environmental damage. Honey is a natural humectant, drawing moisture to your skin and promoting hydration.

    What is the best way to apply a green tea face mask for glowing skin?

    To apply the mask effectively, start with a clean, dry face. Use your fingertips or a brush to spread the mask evenly over your skin. Leave it on for about 20-40 minutes before rinsing with warm water for optimal results.

    How do I make a green tea face mask for overnight use?

    For an overnight mask, combine 1 teaspoon of green tea powder, 1 tablespoon of honey, and 1 tablespoon of aloe vera gel. Mix well and apply a thin layer to clean skin. Rinse it off in the morning to enjoy refreshed skin.

    We are on YouTube
    How to Make Your Skin GLOW with 3 Ingredients

✨ DIY Carrot Glow Cream Recipe
This recipe is designed to infuse your skin with the antioxidant power of carrots (beta-carotene) using just three core ingredients, as seen in your video.

🥕 Ingredients
Fresh Carrots (Grated)
Coconut Oil (For the oil infusion)
Aloe Vera Gel (For the cream base)

👩‍🍳 Step-by-Step Instructions
Roast the Carrots (Maximize Potency): Gently roast or dry the grated fresh carrots. This step helps to intensify and make the beta-carotene more accessible for extraction.

Infuse the Oil (Extract the Goodness): Place the roasted/dried carrots into a clean jar and cover them completely with coconut oil. Seal the jar and allow it to infuse, ideally overnight or longer, to extract the powerful antioxidants into the oil.

Strain the Oil (The Foundation): Carefully strain the oil mixture into a clean jar, separating the liquid (carrot oil) from the solids. This golden liquid is the foundation of your cream.

Create the Cream Base (Mix the Magic): Start with a dollop of pure aloe vera gel in a bowl.

Whisk and Transform: Slowly add the precise amount of your homemade carrot-infused oil to the aloe vera gel. Whisk the two ingredients together until they instantly transform into a smooth, vibrant orange cream.

🌟 Benefits
Vitamin A/Beta-Carotene: Carrots are rich in beta-carotene, a precursor to Vitamin A, which is known for promoting skin renewal and a healthy glow.

Moisture Lock: The combination of coconut oil and aloe vera helps to deeply hydrate and lock in moisture.

*Disclaimer: Always do a patch test before applying new products, especially DIY recipes, to your skin.*


Watch as we make a luxurious DIY carrot cream for a healthy, radiant complexion! This skincare diy uses natural ingredients to create a homemade skincare solution that's perfect for face care. We'll show you how to get glowing skin with this simple homemade recipes for a carrot body butter.
    I Made a Carrot Cream and My Skin Glows Now #skincare #natural #diy
    Watch how she transforms an empty Tree Hut Sugar Scrub jar into a viral DIY! 🤯 She didn't throw out her old jar—she refilled it from scratch with a homemade body scrub that looks even better than the original.

This DIY Tree Hut Scrub dupe is perfect for anyone looking for a skincare hack to save money and customize their exfoliation.

Ingredients used in the video:

Sugar
Ground Coffee
Body Wash (for a creamy base!)
Honey
Coconut Oil

Have you ever tried making your own body scrub? Let us know your favorite DIY skincare recipes in the comments!

#TreeHut #BodyScrub #DIYSkincare #SkincareHacks #TreeHutDupe #HomemadeScrub #BeautyHacks #Exfoliation #SelfCare #SugarScrub #YouTubeShorts #DIYBeauty

Watch as she creates a luxurious "homemade sugar scrub" right from her kitchen, reusing an old container. This "diy body scrub" combines simple ingredients for a fraction of the cost of store-bought versions, making it an ideal "body scrub at home". With this easy "sugar scrub for body", you can achieve incredibly smooth skin. It's a fantastic "diy projects" that shows you "how to make your skin smooth" naturally.
    Homemade Body Scrub That Looks Even Better Than Tree Hut #skincare
    DIY Moong Dal & Aloe Vera Face Mask for INSTANT GLOW! ✨

You won't believe the secret ingredient for **glowing skin**—it's **LENTILS** (specifically moong dal)! 🤯 Watch this quick DIY to see how she transformed simple kitchen ingredients into a powerful **natural face mask** for instant brightness.

In this short, she blended fine moong dal (split yellow lentils) into a powder, mixed it with soothing aloe vera gel, and a splash of water to create a creamy, natural beauty paste. This is your new go-to homemade glow mask!

**How to Use for Best Results:**
* Apply the mask evenly to your face.
* Leave it on for just **20 minutes**.
* Rinse thoroughly with **cold water** to close pores and lock in the brightness.

This quick DIY skincare hack uses traditional Indian beauty secrets (Ayurveda-inspired) to give you soft, bright, and glowing skin without harsh chemicals. Perfect for those looking for natural skincare routines and affordable beauty tips.

What do you think of this amazing hack? Let me know in the comments if you’ve tried a lentil mask before! 👇
👉 Like this video if you love natural beauty tips!
🔔 Subscribe for more easy DIYs and skincare hacks!

#diybeauty #skincarehacks #naturalbeauty #glowingskin #indianbeauty #moongdal #facepack #homemadefacemask #skincaretips #selfcare
    I Tried a DIY Lentil Face Mask and WOW! #skincare
    The #1 Natural Face Mask For Glowing Skin! ❤️ DIY Anti-Aging Recipe

Want brighter, younger-looking skin without expensive serums? This viral DIY face mask uses a surprisingly powerful ingredient: banana peels!

Watch the full short to learn how to make this simple, all-natural anti-aging remedy that also brightens and adds a gorgeous glow to your skin.

The 7-Day Challenge: Apply this mask every day for one week to see amazing results. It's packed with vitamins and antioxidants to help reduce the appearance of fine lines, wrinkles, and dark spots.

DIY Banana Peel Face Mask Recipe
What You'll Need:

1 Banana peel
2 tablespoons rice
200 ml of water
1 tablespoon milk powder
1 tablespoon cornstarch
1 tablespoon lemon juice

Instructions & Storage:

Boil the banana peel and rice in water until soft.

Blend the mixture until smooth.

Stir in the milk powder, cornstarch, and lemon juice.

Store in an airtight container in the refrigerator for up to 7 days.

👍 If you loved this natural skincare hack, hit the LIKE button and SUBSCRIBE for more easy DIY beauty recipes!

#DIYfaceMask #BananaPeelMask #AntiAgingMask #GlowingSkinHack #NaturalSkincare #RiceMask #DIYBeauty #YouTubeShorts #SkincareRoutine #WrinkleTreatment
    The #1 Natural Face Mask for Glowing Skin! ❤️ DIY Anti-Aging Recipe #skincare
    How to Make DIY Korean Flaxseed Mask for Skin Whitening (Natural Botox Effect!) 

Get the viral **"Natural Botox"** effect at home with this simple **DIY Korean flaxseed mask** recipe! This homemade treatment is famous for making skin look tighter, brighter, and deeply hydrated.

This short video shows you exactly how to make the best flaxseed gel mask using a simple addition—rice flour—for a powerful skin whitening and glass skin effect.

### ✨ Why this Mask Works:
* **Flaxseed Gel:** Rich in Omega-3s and antioxidants, it provides incredible hydration and creates a visible, temporary lift/tightening effect as it dries.
* **Rice Flour:** A key ingredient in Korean and Japanese skincare, known for its gentle brightening and skin-softening properties.

### 📋 Full Recipe Ingredients:
* 1 Cup Water
* 3 Tablespoons Whole Flaxseeds (Linseeds)
* 1 Tablespoon Rice Flour (or Cornstarch)

### 🌿 Quick Instructions:
1.  Boil water, flaxseeds, and rice flour.
2.  Stir continuously until it forms a thick, gelatinous paste (consistency shown in video).
3.  Cool completely. Apply thickly to face.
4.  Rinse off after 20-30 minutes for glowing, firm skin!

**➡️ Did you try this DIY face mask? Drop a comment below!**
👍 **Like and Subscribe for more easy natural skincare recipes and beauty hacks!**

#skincare #DIYMask #FlaxseedMask #NaturalBotox #KoreanSkincare #KBeauty #SkinWhitening #SkinFirming #AntiAgingTips #HomemadeSkincare #GlassSkin #RiceMask
    How to Make DIY Korean Flaxseed Mask for Skin Whitening (Natural Botox Effect!) #skincare
    Ultimate Blackhead Removal Hack! DIY Gelatin & Coffee Peel-Off Mask ☕️

Watch this satisfying mask detox your skin and remove blackheads, dead skin, and dirt! Get super smooth and fresh skin with this simple home remedy.

**✨ How to Make It:**
1. Scoop 1 part Gelatin, 1 part Coffee grounds, and a splash of Hot Water into a bowl.
2. Mix well until the gelatin dissolves and you have a thick, smooth paste.
3. Apply to your nose/t-zone and let it completely dry (about 15-20 minutes).
4. Slowly peel off the mask and see the results!

**⚠️ Note:** Always do a small patch test first. Do not use if you have sensitive or broken skin.

#shorts #blackheads #blackheadremoval #skincare #diyskincare #peeloffmask #satisfying #coffeemask #homeremedy #beautyhacks #skinroutine
    Ultimate Blackhead Removal Hack! DIY Gelatin & Coffee Peel Off Mask #skincare
    Load More... Subscribe
    Share. Facebook Twitter Pinterest LinkedIn Tumblr Email
    Hershey

    Hi, I’m Hershey — a lifelong natural skincare enthusiast with a love for creating simple, homemade beauty solutions that actually work. Inspired by my grandmother’s herbal remedies and my own sensitive skin journey, I started DIY Beauty Corner to share effective, affordable skincare recipes made from ingredients you already have at home.

    Related Posts

    DIY Vanilla and Brown Sugar Body Scrub Recipe

    August 6, 2025

    How to Make a DIY Yoni Oil for External Use

    July 30, 2025

    10 Easy Ways to Make Rosemary Water for Hair Growth (Benefits + How to Use)

    December 13, 2024

    Hi, I'm Hershey. I'm a skin care and beauty blogger who's NOT a morning person. (Seriously, who is?) I love making DIY skin care remedies from natural ingredients, and sharing my recipes and tips that can be used at home. Whether you're looking for ways to save money on your beauty routine, or just want to know how to take better care of your skin, you'll find something useful on my blog. So why not stick around for a while?

    Grandmas Homemade Face Mask Recipe

    Continue Reading
    DIY Beauty Corner

    Popular This Month

    • Sugar & Honey Body Scrub
    • Organic Body Butter
    • Korean Glass Skin Rice Mask
    • Turmeric Glow Body Scrub
    • Rosemary Hair Growth Oil
    • Quick Coffee Sugar Scrub
    • Vanilla & Brown Sugar Scrub
    • Pink Whipped Sugar Scrub
    • Non-Greasy Body Butter
    • Lemon Sugar Scrub

    Browse by DIY Recipe Type

    Body Scrub Recipes
    Face Mask Recipes
    Body Butter Recipes
    Hair Growth Recipes
    Lip Balm Recipes
    Perfume Recipes
    ⚠️ Please note: I’m not a licensed dermatologist or medical professional. All recipes shared are based on personal experience and research. Always perform a patch test before trying new skincare, and consult a healthcare provider for specific concerns.
    Pinterest YouTube
    • About
    • Contact
    • Disclaimer
    • Privacy Policy
    • Terms and Conditions
    © 2025 DIYBeautyCorner.com.

    Type above and press Enter to search. Press Esc to cancel.