
Creating a sparkling lip gloss at home is a fun and rewarding project that allows you to personalize gifts for friends and family. This DIY sparkling lip gloss recipe is easy to follow and makes for a thoughtful homemade gift that anyone would appreciate. With just a few simple ingredients, you can craft a lip gloss that is not only stylish but also nourishing for the lips.

Imagine giving your loved ones a product that combines the joy of beauty with the care of natural ingredients. You can customize flavors and colors to suit each individual’s taste, making each lip gloss unique. Prepare to impress your friends and family with this creative and delightful gift idea.
Gather your supplies and get ready to make a dazzling lip gloss that stands out. In the following sections, you will find a detailed recipe and a list of ingredients to help you create your own sparkling lip gloss.
Creating Your DIY Sparkling Lip Gloss
Crafting your own sparkling lip gloss is a fun and creative way to express your style and make thoughtful gifts. You’ll need to gather specific ingredients and tools, then follow a straightforward mixing process. Personalizing your lip gloss with color and sparkle will ensure each batch is unique.
Gathering the Necessary Ingredients
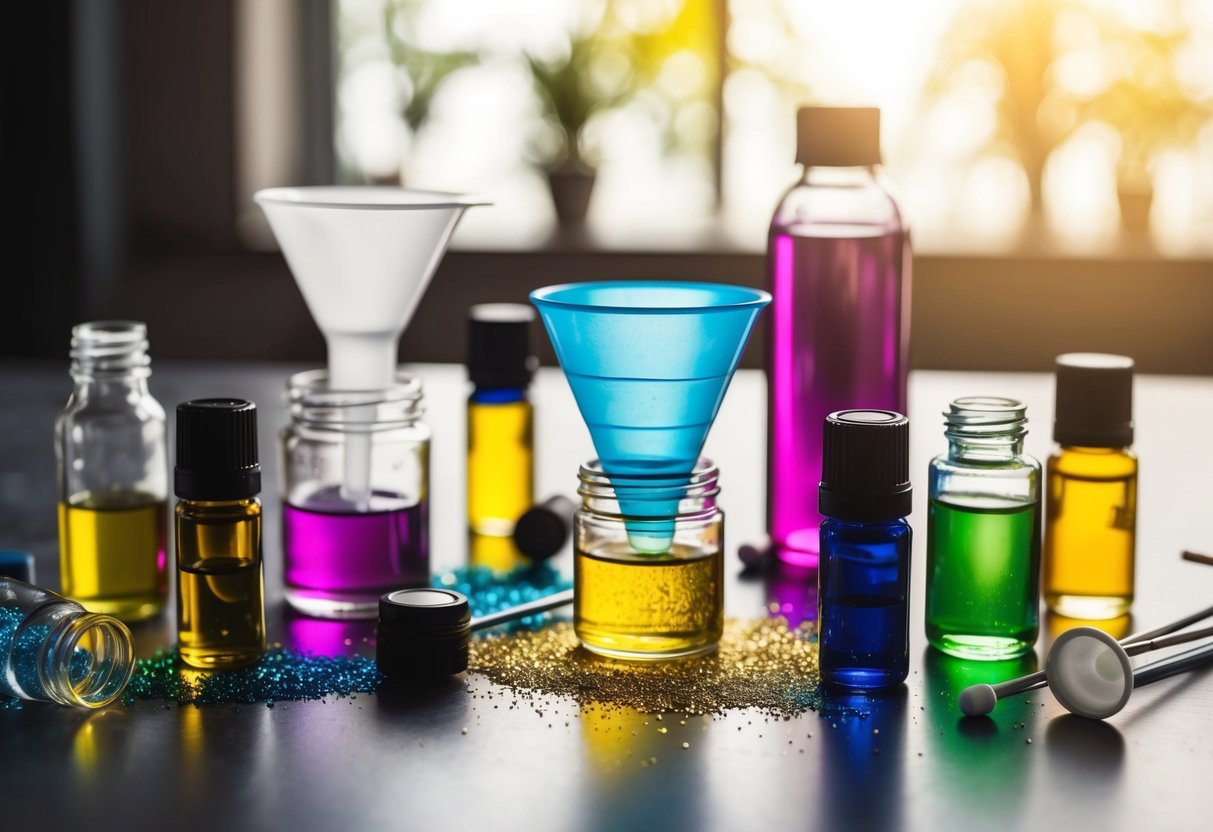
To create your sparkling lip gloss, you will need the following ingredients:
- Carrier Oils: Use a mix of oils like jojoba, coconut, or sweet almond oil (about 2 tablespoons). These will moisturize your lips.
- Beeswax: About 1 tablespoon of beeswax will help thicken the gloss and give it stability.
- Flavoring: Choose flavored oils like peppermint or vanilla to add a pleasant scent (1 teaspoon).
- Colorants: You can use cosmetic-grade pigments or a few drops of food coloring for color.
- Glitter: Cosmetic-grade glitter provides the sparkle (1 teaspoon).
This combination creates a smooth, glistening finish. Adjust the ratios based on your desired gloss thickness.
Tools and Equipment Needed
Having the right tools is essential for an effective lip gloss creation process. Gather the following items:
- Double Boiler: This is crucial for melting the beeswax and oils gently.
- Glass Beaker or Bowl: Ideal for mixing your ingredients.
- Whisk or Spoon: You will need this to blend your mixture properly.
- Lip Gloss Containers: Choose small tubes or pots for storing your finished product.
- Funnel or Dropper: These tools help you pour the mixture into your containers without spilling.
Ensure all equipment is clean and dry before starting. This helps maintain the quality and shelf life of your lip gloss.
Step-By-Step Mixing Process
Melt the Base: In a double boiler, combine the beeswax and carrier oils. Heat over low to medium heat until melted, stirring occasionally.
Cool Slightly: Remove from heat and allow to cool slightly. This prevents the addition of pigments and glitter from breaking down.
Add Color and Glitter: Stir in your preferred cosmetic pigments and glitter until well-mixed. Adjust the amount to achieve your desired color and sparkle effect.
Flavor it Up: Incorporate the flavored oil into your mixture. This step adds a nice scent and subtle taste.
Pour into Containers: Quickly transfer the mixture into your lip gloss containers. Use a funnel or dropper for accuracy.
Allow the gloss to cool completely before sealing the containers. This will ensure the texture is just right.
Customizing Color and Sparkle
Personalizing your lip gloss is simple and enhances its appeal. Focus on the following:
Color Selection: Experiment with different cosmetic pigments to achieve unique shades. A little goes a long way, so start with a small amount.
Adjusting Sparkle: Vary the amount of glitter for more or less shimmer. Different types can impart a fine or chunky sparkle, depending on your preference.
Theme Variations: Consider themed colors for holidays or events. A bold red for Valentine’s Day or shimmering gold for New Year’s works well.
Tip: Always use cosmetic-grade products to ensure safety on your lips. Enjoy the creative process and have fun experimenting with combinations!
Packaging and Presentation Ideas
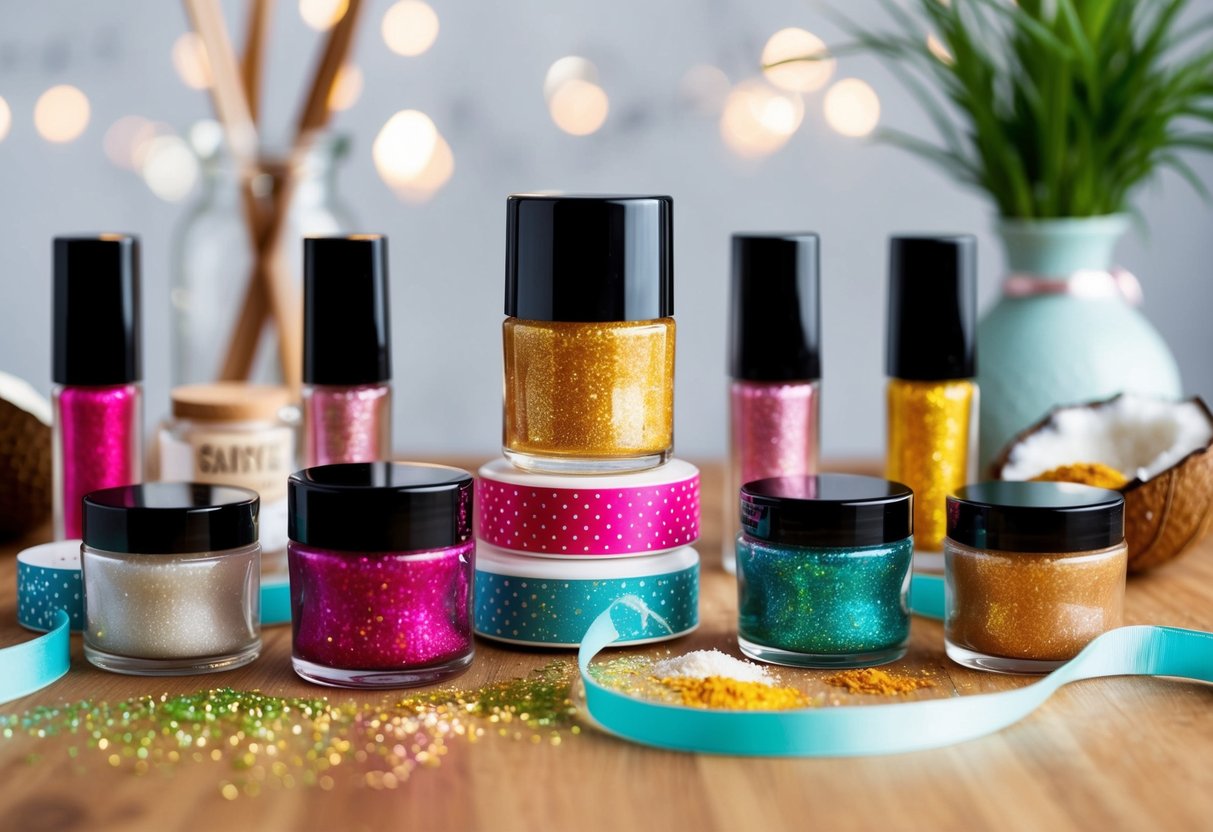
Creating an appealing presentation for your homemade lip gloss elevates the gift experience. Consider various container options, labeling techniques, and wrapping styles to enhance the visual appeal of your product.
Selecting Containers for Lip Gloss
Choosing the right containers for your lip gloss is essential for both functionality and aesthetics. You can opt for classic options like small glass jars or squeeze tubes that allow for easy application. Look for containers with a clear design to showcase the beautiful colors and sparkle of your gloss.
Consider using eco-friendly materials such as bamboo or recycled plastic for sustainability. These options are not only trendy but also appeal to environmentally conscious recipients. Smaller travel-sized containers work well for gifts, making it easy for friends and family to carry them anywhere.
Labeling and Decoration Techniques
A thoughtful label can enhance the personal touch of your DIY lip gloss. Create your own labels using sticker paper or craft paper. Choose a font that reflects the style of your product and includes essential information like the flavor and ingredients.
Decorate the label with small illustrations or graphics to add a fun pop. Consider using colorful washi tape around the edge of the container for additional decoration. This simple technique can make the product look well-crafted and visually appealing. You can also include a small note with care instructions or the reason you chose specific ingredients.
Gift Wrapping Options
When it comes to wrapping, try using clear cellophane bags to showcase the beautiful lip gloss inside. Tie them with a ribbon that complements the container’s color for a polished look.
Alternatively, consider using small gift boxes or kraft paper bags, which can be personalized with stamps or hand-drawn designs. Using a themed color palette for the wrapping can create a cohesive gift package. Don’t hesitate to include a little card for a personal message. This thoughtful addition makes your gift even more special.