DIY beauty projects don’t require a dedicated studio or a large set-up. In fact, many people enjoy DIY beauty most when it feels simple, tidy, and easy to return to — whether that means using a corner of the kitchen table, a small tray on a desk, or a shelf that holds a few essentials.
A well-organised workspace makes DIY beauty feel more enjoyable because it reduces mess, saves time, and keeps the creative process relaxed. This guide shares practical, low-effort ways to create a DIY beauty workspace at home that fits into real-life spaces. If you’re still new to the hobby overall, Getting Started With DIY Beauty Projects is a helpful next read for building a simple routine and choosing beginner-friendly projects.
Start With the Goal: Simple, Not Perfect
The best DIY beauty workspace is one that makes it easy to start a project and easy to clean up afterwards. It doesn’t need to look like a workshop or a craft room — it just needs to feel functional and comfortable.
A simple workspace helps you:
- Set up quickly when inspiration strikes
- Keep tools and containers easy to find
- Reduce clutter and avoid “project sprawl”
- Enjoy DIY beauty as a hobby without stress
Think of your workspace as a small, flexible station rather than a permanent installation.
Choose a Space That Works With Your Routine
DIY beauty projects are easiest to maintain when your workspace fits naturally into your home routine. Many people choose a space that already feels practical — such as a kitchen counter, dining table, or a small desk area.
Common DIY beauty workspace options include:
- Kitchen counter: Easy access to bowls and quick clean-up
- Dining table: More space for flat lays, jars, and tools
- Desk or side table: Convenient for small-batch projects
- Utility area: Practical storage for tools and containers
If you don’t want a permanent set-up, a portable workspace (like a tray or caddy) is often the easiest option.
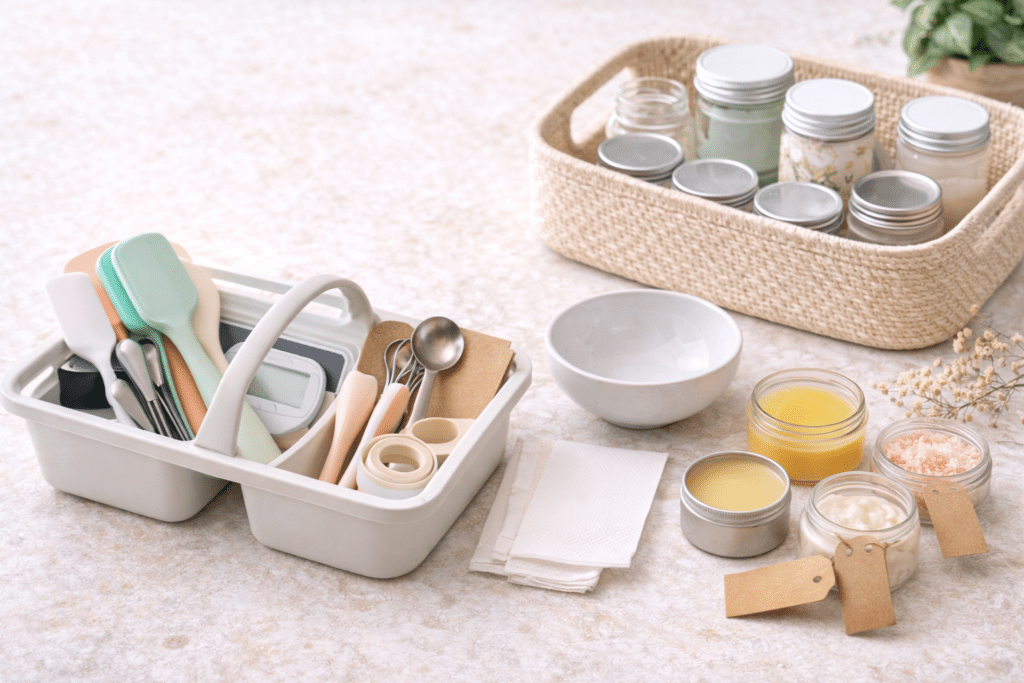
Use a “Portable Set-Up” for Small-Batch Projects
A portable set-up is one of the simplest ways to create a DIY beauty workspace — especially if you like keeping things tidy between projects. Instead of storing everything spread out across multiple areas, a portable set-up keeps your essentials together in one place.
Popular portable workspace ideas include:
- A tray that holds tools and a few containers
- A handled caddy for supplies and quick clean-up
- A storage box that becomes your “project kit”
- A drawer section dedicated to DIY beauty tools
This approach works well for small-batch DIY because you can set it out when you’re ready, then pack it away in minutes. If you enjoy keeping projects small and manageable, Small-Batch DIY Beauty Explained shares why this approach is so popular for relaxed, beginner-friendly DIY.
What to Keep in a Simple DIY Beauty Workspace
Keeping your workspace simple usually means sticking to a small set of essentials. Many DIY beauty creators prefer a “core kit” approach — a few reliable tools and containers rather than lots of extras.
| Workspace Essential | Why It Helps |
|---|---|
| Small mixing bowl | Easy to use for small-batch projects and quick clean-up |
| Measuring spoons or small scoop | Makes portions feel consistent without overthinking |
| Spatula or small spoon | Useful for mixing and transferring into jars |
| Paper towels or wipes | Helps keep the workspace tidy during projects |
| Jars and tins (a small selection) | Supports small-batch projects and gifting |
| Labels or tags (optional) | Makes finished projects feel more organised and gift-ready |
You can add extras over time, but a small core kit usually makes DIY beauty feel easier and more enjoyable.
Lighting and Surface Tips (Especially for Photos)
If you like photographing your DIY projects for Pinterest or personal reference, lighting and surface choices can make your workspace feel more practical. You don’t need professional equipment — simple adjustments can make a big difference.
Helpful workspace choices include:
- Natural light: A space near a window often works best
- Neutral surfaces: Light backgrounds help jars and textures stand out
- A wipeable mat or board: Keeps clean-up quick and protects surfaces
- A small photo corner: Even a single spot for flat lays can be enough
This keeps the workspace both functional and visually appealing without overcomplicating it.
Keep Clean-Up Simple With a “Reset Routine”
The easiest way to keep DIY beauty enjoyable is to make clean-up part of the process. Many hobbyists find it helpful to end each project session with a quick reset so tools and supplies don’t end up scattered around the house.
A simple reset can include:
- Wiping down the surface
- Putting tools back into the caddy or drawer
- Restacking jars and lids neatly
- Placing finished projects in a dedicated spot
This routine can take just a few minutes and makes it easier to start your next project.
How to Keep Your Workspace Calm and Clutter-Free
DIY beauty supplies are often small, which can make them easy to collect over time. If you want your workspace to stay simple, it helps to keep your “workspace zone” intentionally limited.
Many people keep things calm by:
- Keeping only a small container selection available
- Storing extras separately (out of sight)
- Maintaining a simple core kit of tools
- Creating space for finished projects rather than piling supplies
A clutter-free workspace encourages creativity and keeps DIY beauty feeling like a relaxing hobby.
Final Thoughts
Creating a DIY beauty workspace at home doesn’t need to be complicated. A simple set-up — whether it’s a tray, caddy, or small corner of a table — can make DIY beauty easier, tidier, and more enjoyable.
By focusing on a small core kit, practical storage, and an easy reset routine, you can create a workspace that supports creativity without taking over your home.